Amazing Service from Apple

This isn’t strictly photography-related, but can be for anyone using any Apple product. All customer service should be like this!

The weekend before this past one, I upgraded to an iPhone 6. While I was in the AT&T store, I had to log into my iTunes account with my Apple ID in order to get the phone activated. When I went to do that, I was told (well, on the screen) that I had to change my Apple ID to an email address. My Apple ID had always been a series of letters, but not an email address.

I changed it as requested, and it worked great in the store.

When I got home, I tried to get all my apps on my new phone through iTunes. The apps copied over just fine, but I couldn’t use the ones I had bought, and none of them would update. I kept getting an error message that they were bought using a different Apple ID, so were not authorized on this phone. I checked all settings, and tried several things, but to no avail.

After searching the Apple site for a solution, I sent a message via their site stating my problem. Within a second of clicking Send, my phone rang. It was Apple. I was shocked it was even possible for the call to have been made so quickly. The message said they had received a request for help, but there might be a delay on the phone due to call volume. Yet within a minute, I was talking to a live person! He checked a couple things, then said I would need to talk to a specialist. He said they were quite busy at night (and this was a Sunday night); it would likely be at least 45 minutes on hold. Mornings are always better. Could they call me at 8:45 in the morning? I was impressed, but still skeptical. Continue reading

Shoot It Now

Old Chevrolet at Wil's Garage, Chama, NM

Old Chevrolet at Wil’s Garage, Chama, NM

Have you ever been out shooting and, for some reason or other, decide that even though the scene is worth working, you’ll just come back and do it later? I’ve found that rarely works out as hoped.

In September 2014, I saw this old Chevrolet parked in front of this old garage in northern New Mexico. It looked like a scene that had been frozen in time—possibly for decades. What an opportunity!

But…it was raining fairly hard on and off. And even during the rain, the overcast sky was pretty bright. Then every once in a while, the sun would peak through the broken clouds for a minute or so. This would cause the scene to be strongly backlit, losing all detail. But the image didn’t work from any other angle. Maybe I should just come back in better conditions.

To add to my hesitations, I was supposed to be meeting my buddy Wes from Mesa, AZ, who was driving over for a week of photographing Fall color.

It sure was tempting to just try to shoot it later. Continue reading

Digital Camera Sensor Resolution and Print Sizes

After a presentation to the 4th annual Western North Carolina Foto Fest in Montreat, NC, in September 2013, a couple participants asked me to post my two slides showing the resolutions of digital camera sensors, and effect of resolution on print sizes.

The first slide is reproduced here:

Typical Image Sizes in Pixels

Typical Image Sizes in Pixels

As you can see, a 1.0 megapixel (mp) camera has more resolution than the old NTSC television and more than most PC displays used to have. You might be surprised that a 3.0 mp sensor has more resolution than HDTV! Even more shocking, perhaps, is that the incredible iPad with Retina display has a resolution of 2048×1536 pixels—-exactly what you could capture with a 3.0 mp camera.

So what in the world do we need a 12 mp or 24 mp, or goodness knows, a 36 mp sensor for? That’s where the second slide comes in:

Print Sizes at 240 dpi

Print Sizes at 240 dpi

This chart shows the native print sizes you can make at 240 dpi from the various digital camera sensor resolutions. (Note: I’m not suggesting that you always print at 240 dpi, but that resolution was chosen as a constant to make a comparison. Selecting the appropriate print resolution is a topic unto itself.) Continue reading

Fall Colors in the Smokies Workshop with Willard Clay (and Me) – Oct. 18-21, 2013

What could be better than being in the right place at the right time to capture the incredible Autumn colors in the Smokies, except to be there with enthusiastic fellow photographers, plus the expertise of four experienced photography teachers?

Smokies Fall Color Over River

Workshops through the Great Smoky Mountains Institute at Tremont are unique because they feature four instructors and lots of field work, plus practical classroom and post-processing time—all topped off with a fun critique of images made during the weekend. In addition to truly useful discussions and feedback about the images, the critique session features wine and cheese. And lots of laughs.

Having four instructors guarantees you different points of view, and as much or as little individual assistance as you’d like throughout the entire weekend.

Yours truly starts the weekend at 2:00 pm on Friday, October 18, with a discussion of field equipment and techniques to ensure that you can capture the images you intend.

I also end the long weekend with a couple hours of post-processing instruction from 10:00 through noon on Monday, October 21. Using images made during the weekend, we discuss and demonstrate techniques you can use to get the most out of your images—not that yours need much at all, of course!

As a special attraction this Fall, we’re going to have a raptor shoot at the Tremont campus for anyone who wants to participate.

The entire weekend, including field and classroom instruction, dorm room, and all food is only $611! Even transportation to the field locations is included, if you’d like. That’s quite a bargain.

There is a limit on the number of participants so we can keep the student/instructor ratio small, so reserve your place today. You’ll soon see why so many people come back each year.

For more information, and to register, please check out this site: http://www.gsmit.org/fallphoto.html.

©2013 Tom Vadnais Photography. All Rights Reserved.

Is It Equipment, Photographer, or Both?

It all started innocently enough when a friend e-mailed our group of photography friends asking if he should get a Nikon D600 or D800, and why. Since most of our group happens to shoot Nikon, it was a sensible thing to ask.

For my personal work, I currently use a D800E, and briefly owned a D600 (which is a fantastic camera, but since it’s so close in size to the D800E, I stuck with just the D800E), so I replied with what I saw were the pros and cons of each. Of course, one of the main differences is the greater resolution of the D800, and I mentioned that higher resolution might allow him to create more detailed images, depending on what he was most interested in photographing. But one of the working pros in our group (who currently shoots Canon, but I understand is in therapy for it—-just kidding) took umbrage and said it was the photographer, not the gear, and we were concentrating on all the wrong things.

The ensuing flurry of e-mails has been a really interesting discussion, with no right or wrong, and no definitive answer. But the topic of the importance of good equipment is certainly worth thinking about for yourself. Continue reading

My Post-Processing Epiphany

For a time, I was disappointed that so many of the photography enthusiasts I encountered when judging for or speaking to camera clubs, or when co-teaching photo workshops, didn’t seem to take their photography seriously enough (in my world) to want to master post-processing. More than ever before, it seemed, digital photographers were looking for the easy way out when it came to post-processing. I wondered why.

Maybe this harkened back to the color film days, where you mailed or dropped off your rolls of slide or negative film, and then were either pleased or disappointed by the slides or prints you got back. Except for B&W negatives in the wet darkroom, there was no post-processing done by most film photographers. If you weren’t happy with your prints, you could ask the lab to reprint them. That may or may not get you what you envisioned. If you weren’t happy with your slides, you were out of luck. But if the negatives or slides just weren’t right, your only option was to reshoot, if you could.

But it’s all digital now. So maybe it was the steep learning curve for mastering Photoshop. Maybe it was the result of the proliferation of plug-ins promising perfection at the click of a mouse button. Maybe it was short attention spans in a fast-paced society. Maybe it was simply laziness.

Maybe it was none of those. Continue reading

Some Thoughts About Equipment

Okay, two posts in a row about gear that either didn’t work or was just plain missing. It’s time for the brighter side of photo equipment. Several of the next few posts will feature equipment I’ve used for a long time, and have come to rely on in the field.

Before getting to any specific piece of kit (as my British friends say), it’s worth repeating something my friend and early mentor Bruce Dale (of National Geographic fame) said to me during the first workshop I took from him back in 2002. As I was about to photograph at the Pecos National Monument in New Mexico, he came over and looked in my overstuffed Lowepro Photo Trekker. In essence, he said, “What in the world are you going to shoot with all that stuff? You have way too much gear to ever do much serious photography.”

I must confess the wisdom of those comments didn’t sink in for longer than I’d like to admit. But he was right. Reading tons of photography magazines (remember them?) convinced me I needed every gadget that came along. There might have been a few extraneous lenses in there, too. Continue reading

Comfort Zones & Proper Equipment – Part Two

(Note: Part One is just below this post.)

When we left off, I discovered I didn’t have the right lenses nor the right techniques for capturing birds and critters. But that’s not the end of the story. Hence, Part Two.

As I briefly mentioned in Part One, I also quickly discovered a geared tripod head can be next to worthless for moving subjects. My usual head is an Arca-Swiss C1 Cube, which I absolutely love. Its extreme precision results from its fine-tooth gears that separately control up-and-down (pitch) and side-to-side (roll) motions.

Here’s the beauty of a geared head. Let’s say something’s perfectly aligned from edge to edge in the viewfinder, but is a tad low. Rotating the proper knob will raise the front of the lens without affecting the side to side tilt at all.

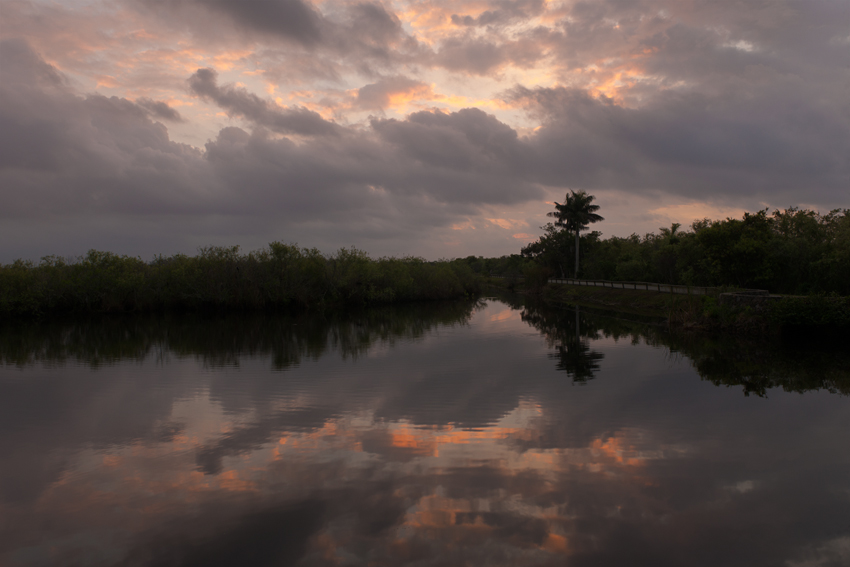
Sunrise at Anhinga Trail

By contrast, loosening the tension on a ball head allows it to move freely in any direction, and may reposition the camera in a way you don’t want. To add insult to injury, many ball heads shift by even the tiniest amount when they are locked back down. You finally get the image perfectly aligned in the viewfinder, but then it moves when you lock the ball head down. Frustrating.

What makes the geared head so perfect for stationary subjects makes it completely worthless for moving subjects (glaciers excluded). By the time you crank the adjustment knobs to capture that bird taking off, it has migrated to another state. But you can precisely frame where it was! Continue reading

Comfort Zones & Proper Equipment – Part One

Thanks to Bill Lea, in February I visited Everglades National Park for the first time as one of the co-leaders of the NANPA Regional Event there. This is the first of two posts about what I learned during that trip.

Before I saw Bill’s photographs for his forthcoming book, I hadn’t thought too seriously about shooting in the Everglades, despite how relatively close the Park is to Atlanta. It seemed like a flat, grassy, swampy area, where the big attractions are birds and critters. I don’t typically shoot birds and critters, nor flat, grassy, swampy areas. It didn’t sound like much of a destination for a landscape and travel photographer. Boy, was I ever wrong.

Fortunately, for several days before the Event, Bill gave us an extensive (and photographically rewarding) tour of the Park, based on his five years of photographing there. I would never have figured out nor enjoyed the Everglades as quickly without Bill’s expert guidance. I found birds and critters fun and challenging to shoot (especially with my equipment), and found the landscape remarkably variable and beautifully photogenic. Now I can’t wait to go back.

As an aside, living with Atlanta traffic, I misunderstood the concept of traveling to a park to shoot birds. During any given rush hour here, you could see so many birds shot within such a short time that it gets old pretty quick. But I get it now.

Believe it or not, just like in many other parks, there are signs denoting elevations in the Everglades. Unlike my experiences in some of the Western parks, however, it wasn’t any harder to breathe even at the highest elevations. I felt pretty much the same at the Elevation 4 Feet sign as I had earlier at the Elevation 3 Feet sign. Guess I’ve stayed in pretty good shape.

My first morning in the Park started with a sunrise shoot over Florida Bay at Flamingo. So far so good. I’m in my comfort zone with my lenses, geared tripod head, focusing cloth, remote release, and the rest of my usual landscape kit.

Sunrise at Flamingo

Sun’s fully up now, so landscape photography is done. It’s off to nearby Eco Pond to shoot birds. Hey, these bloody things move! What’s up with that? And they’re relatively small. And relatively far away. And just as soon as I compose my shot, it’s either changed or gone. There goes my comfort zone. Continue reading

Best Smokies Workshops

Since 2005, I have had the honor of co-teaching two photo workshops per year through the Great Smoky Mountains Institute at Tremont, or GSMIT. For the Spring workshop, I am one of four instructors, led by great friend and legendary Smokies photographer Bill Lea. (Bill is soon to be a legendary Everglades photographer, but that’s a subject for another post this weekend.)

Bill Lea’s newly revamped website is www.billlea.com. Our other instructors (and longtime friends) are wildlife and computer wizard Todd Moore (www.naturephotog.com) and professional photographer and master printer Jeff Miller (www.mountainlens.com).

Trillium and Falls

The workshop is a fun, action-packed four days of talks, shooting, post-processing, and critiques. It all starts with a presentation about the Fundamentals of Photography in the Field by yours truly at 3:00 pm on Friday, April 20, 2012. It ends Monday, April 23, 2012, at 12:30 pm after a couple presentations by me on post-processing and on the challenges of landscape photography. (Don’t worry; I’m pretty quiet in between those. Well, not officially talking, at least!)

Bill will be presenting programs on Light (Friday night), Close-up Photography (Saturday afternoon), and Wildlife Photography (Sunday morning). Wow, sounds like a lot of presentations. It is, but wait, there’s more! Lots more.

During the workshop, we spend even more time out shooting in the field than we do inside for presentations. We are out before sunrise on Saturday and Sunday, with breakfast in the field. (How’s that for service!?!) We’re also out in the afternoon and evening until after the sun goes down both Saturday and Sunday, again with our meals in the field.

Spring Greens at Foothills

In the time between shooting sessions and talks (I told you it was action-packed), we help with your downloading and post-processing needs. We’ll help you select three images to submit for the critique Sunday afternoon before our final organized field session. For many participants, this group critique is the highlight of the weekend. Afterward, we go right back into the field to apply what we’ve covered in the critiques.

Before the presentations Monday morning, there are several choices for sunrise field trips. This gives you yet another chance to capture sunrise at a location of your choice. By the time the light is too harsh for good photography later in the morning, it will be time for the last two talks and discussions.

Spring Green Tree, Cades, Cove

We usually have quite a few returning participants every time. And that’s not because they flunked and had to retake the course! It’s because it is so much fun, and they can see improvements in their photography each time.

For more information, or to register, please check out: http://www.gsmit.org/springphoto.html

Please feel free to e-mail me if you have any questions or would like more information. I hope to see you there!