In the first Shoot It Now post, I described how a scene can unexpectedly change at almost any time when part of the subject is removed. Scenes can also be irrevocably altered when potential subjects are torn down, uprooted, broken, burned, or collapse. I had originally posted this a couple years ago, but not only did the subject cabin gradually collapse, it has now been torn down and almost completely removed. These photos show the progression.
During the Spring and Fall workshops at the Great Smoky Mountains Institute at Tremont (www.gsmit.org/photo.html), we always take participants to photograph details of the old, deteriorating homes in Elkmont. It’s one of our most popular shooting locations. There used to be dozens of old cabins, but only a few of them are now being saved and renovated by the National Park Service. All the rest have been torn down and removed.
As an aside, before the remaining houses are restored, they are in varying states of disrepair. The National Park Service prohibits anyone from going in some of them, and will ticket you if they catch you inside. This makes a lot of sense, since the floors, walls, and roofs could (and do) give way without warning. If you’re planning to photograph old structures anywhere, please be very careful about exploring inside them, and stay out if there is a No Trespassing sign. It’s for your safety.
One of the houses along Little River had a beautiful wooden staircase. Both the stairs and railing were dark brown, which contrasted well with the white ceiling and walls. I have photographed it several times from the collapsing wooden front porch through the always open front door. Fortunately, in addition to the front door, there were three windows just to the left of the staircase, and two across from it that let light into the room.
The first image shows the staircase in 2008. While it is the obvious subject, the subtle shadows on the wall beneath it add interest. Also, the window to the left both gives light and provides depth by showing part of the outside of the house.

Elkmont House Staircase – 2008
By 2013, the roof began to cave in. Somehow, the window screen was still there, despite the window having fallen out. The staircase and its shadows are still the main subjects, but the story now includes the deterioration of the house around it.

Elkmont House Staircase – 2013
Just a year later, the entire roof had collapsed into the room. The arrow highlights all that could be seen of the staircase anymore. Obviously, it could no longer be the subject of any photograph—except this one!
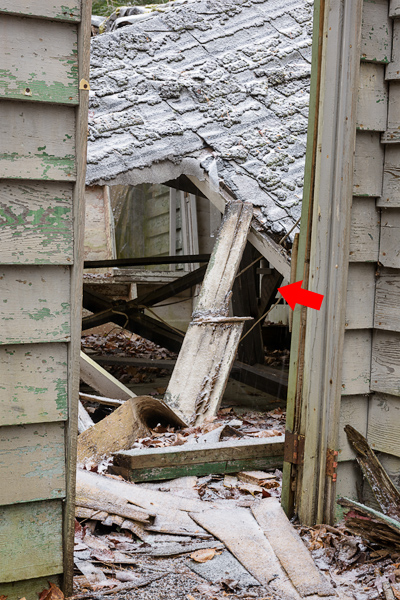
Elkmont House Staircase – 2014
During 2017, the National Park Service took down and removed many of the cabins in Elkmont, including this one. All that remains of those are the stacked stone chimneys and the stone foundations. I certainly miss the old cabins, but am grateful I was able to see and photograph them before they were gone. Here is a view of what’s left of the cabin from where the front porch and door used to be.

Cabin with Elkmont staircase was removed by NPS. (ZEISS Otus 28mm f/1.4 on Nikon D850.)
So if you come across a potential subject, photograph it right then and there. You’ll never regret making an image of a particular subject, even if you make a better one later. But you’ll always regret not having photographed it, especially once it’s gone.
©2018 Tom Vadnais Photography. All Rights Reserved.

 Since all lenses and image sizes are the same between 35 mm film and full frame DSLR cameras, the 35 mm equivalent name is used for full frame DSLRs, even though nothing measures 35 mm in their image frames.