Category Archives: Field Techniques

ZEISS Milvus 15 mm, 18 mm, 21 mm, and 25 mm Lenses

ZEISS makes four ultra-wide Milvus lenses: 2.8/15 mm, 2.8/18 mm, 2.8/21 mm, and 1.4/25 mm. Can there be an appreciable difference with only a three or four millimeter focal length change between lenses? After all, if you have a 100-400 mm zoom lens, you probably couldn’t even notice the difference between 344 and 348 mm focal lengths. But you’ll see that just a couple millimeters makes quite a difference with very wide angle lenses.

I made this series of photographs on a sunny day with very contrasty light to show how the four lenses handle very difficult lighting conditions. Polarizing filters somewhat tempered the extreme contrasts. I used Heliopan High-Transmission polarizers for the 18, 21, and 25 mm lenses, and a ZEISS polarizer for the 15 mm lens. Before I made these JPEGs from the raw images, I reduced highlights by 30 in Adobe Camera Raw (ACR) to make sure the clouds wouldn’t blow out when converted. Otherwise, these raw images were straight from the camera. All were made at f/8 on a full-frame Nikon D850 DSLR.

Note how much more of the trees you can see at both edges of the frame with the wider lenses. Also, notice how City Hall seems to shrink and recede as the lenses get wider.

Roswell, GA, City Hall (ZEISS Milvus 1.4/25 mm lens on Nikon D850.)

Roswell, GA, City Hall (ZEISS Milvus 2.8/21 mm lens on Nikon D850.)

Roswell, GA, City Hall (ZEISS Milvus 2.8/18 mm lens on Nikon D850.)

Roswell, GA, City Hall (ZEISS Milvus 2.8/15 mm lens on Nikon D850.)

Here are the diagonal/horizontal/vertical angles of view for these four lenses:

2.8/15  110°/100°/76°

2.8/18  100°/89°/67°

2.8/21  90°/81°/59°

1.4/25  81°/71°/50°

Comparing the chart to the photographs shows that for extreme wide angle lenses, the field of view changes noticeably for every 10° diagonal angle of view. So how do you decide which lens(es) to get?

All four lenses are spectacularly sharp, and all exhibit the famous ZEISS micro-contrast and consistent color. They also all show little distortion with the appropriate Lens Correction selection in ACR. (Note: most recent DSLRs have in-camera lens corrections for JPEGs. Raw image lens corrections are handled in raw conversion software, such as ACR and Lightroom.)

As you can see, the wider the lens, the larger the foreground and the smaller the subject become. (Of course this is true regardless of the brand of the lenses.) Look at how much more of the trees at either edge of the image are visible with wider focal lengths. But even though there are significant differences in the images, unless you do a lot of very wide angle shooting (think architecture and interiors), it is unlikely you’ll need all four of these lenses.

If you primarily shoot landscapes, including Milky Way photos at night, you might find the 15 and 21 mm lenses the best combination. For large scale and intimate landscapes, the 18 and 25 mm lens pair might be most useful. If you’re just venturing into wide-angle shooting, the 25 mm lens will likely be the most versatile. It’s also one of the sharpest and most desirable lenses ever made. It’s one you’ll keep for a lifetime.

As always, it is best to try these out for yourselves. I highly recommend renting them individually or in groups before purchasing any of them.

©2018 Tom Vadnais Photography. All Rights Reserved.

Shoot It Now, One More Time

Here’s another example of how an unexpected change can affect a photographic subject for many years.

There is a great water wheel at Cable Mill in Cades Cove in the Smokies. It had been quite photogenic, especially with its thick coating of moss. Here’s an image of the wheel made in April 2014.

Cades Cove Grist Mill with moss. (Made 04/30/14 with Nikon 70-200mm f/2.8 lens at 85mm on Nikon D800E.)

This photograph of the wheel was made in May 2018.

Cades Cove Grist Mill with new moss-free boards. (Made 05/03/18 with ZEISS Otus 85mm f/1.4 on Nikon D850.)

The paddle boards had recently been replaced, making the wheel much less photogenic. It will be years until moss fully coats the wheel again. In fact, there was no reason for me to even make this photo except to illustrate what can happen if you don’t make an image when you first see the possibility.

If you make an image, you can always make a better one later if the light, the conditions, or your equipment are better. If the subject later changes or is gone, you’ll always regret not having made the image when you first saw it. Shoot it now.

©2018 Tom Vadnais Photography. All Rights Reserved.

Shoot It Now, Revisited

In the first Shoot It Now post, I described how a scene can unexpectedly change at almost any time when part of the subject is removed. Scenes can also be irrevocably altered when potential subjects are torn down, uprooted, broken, burned, or collapse. I had originally posted this a couple years ago, but not only did the subject cabin gradually collapse, it has now been torn down and almost completely removed. These photos show the progression.

During the Spring and Fall workshops at the Great Smoky Mountains Institute at Tremont (www.gsmit.org/photo.html), we always take participants to photograph details of the old, deteriorating homes in Elkmont. It’s one of our most popular shooting locations. There used to be dozens of old cabins, but only a few of them are now being saved and renovated by the National Park Service. All the rest have been torn down and removed.

As an aside, before the remaining houses are restored, they are in varying states of disrepair. The National Park Service prohibits anyone from going in some of them, and will ticket you if they catch you inside. This makes a lot of sense, since the floors, walls, and roofs could (and do) give way without warning. If you’re planning to photograph old structures anywhere, please be very careful about exploring inside them, and stay out if there is a No Trespassing sign. It’s for your safety.

One of the houses along Little River had a beautiful wooden staircase. Both the stairs and railing were dark brown, which contrasted well with the white ceiling and walls. I have photographed it several times from the collapsing wooden front porch through the always open front door. Fortunately, in addition to the front door, there were three windows just to the left of the staircase, and two across from it that let light into the room.

The first image shows the staircase in 2008. While it is the obvious subject, the subtle shadows on the wall beneath it add interest. Also, the window to the left both gives light and provides depth by showing part of the outside of the house.

Elkmont House Staircase - 2008

Elkmont House Staircase – 2008

By 2013, the roof began to cave in. Somehow, the window screen was still there, despite the window having fallen out. The staircase and its shadows are still the main subjects, but the story now includes the deterioration of the house around it.

Elkmont House Staircase - 2013

Elkmont House Staircase – 2013

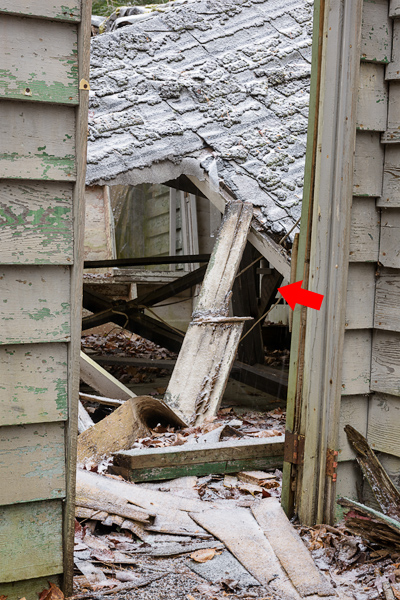
Just a year later, the entire roof had collapsed into the room. The arrow highlights all that could be seen of the staircase anymore. Obviously, it could no longer be the subject of any photograph—except this one!

Elkmont House Staircase - 2014

Elkmont House Staircase – 2014

During 2017, the National Park Service took down and removed many of the cabins in Elkmont, including this one. All that remains of those are the stacked stone chimneys and the stone foundations. I certainly miss the old cabins, but am grateful I was able to see and photograph them before they were gone. Here is a view of what’s left of the cabin from where the front porch and door used to be.

Cabin with Elkmont staircase was removed by NPS. (ZEISS Otus 28mm f/1.4 on Nikon D850.)

So if you come across a potential subject, photograph it right then and there. You’ll never regret making an image of a particular subject, even if you make a better one later. But you’ll always regret not having photographed it, especially once it’s gone.

©2018 Tom Vadnais Photography. All Rights Reserved.

Nikon D850 Review by Steve Perry

Without question, the Nikon D850 is the best camera I’ve ever owned. I love everything from how it handles to its astoundingly detailed image files. Even if you’ve read about it elsewhere online, you owe it to yourself to check out Steve Perry’s video and written reviews: Steve Perry’s Nikon D850 Review.

Steve is an amazing wildlife and bird photographer with real-world experiences using most current Nikon DSLRs. From his experiences shooting tens of thousands of frames with multiple cameras in numerous photo shoots, Steve gives unvarnished, hands-on insights into the pluses and minuses of each camera.

While you’re on his website, if you’re a Nikon shooter, you owe it to yourself to get his Nikon autofocus book. It’s invaluable. You’ll understand how all the modes work, and when best to use them: Secrets to Nikon Autofocus System.

Regardless of what camera system you use, any wildlife or bird shooter will greatly benefit from his Secrets to Stunning Wildlife Photography book: Secrets to Stunning Wildlife Photography. I don’t do much wildlife or bird photography myself, but I enjoyed and learned a lot from his book. After reading it, I’ve referred back to it a number of times for specific refreshers.

Steve’s blog posts and videos are well done, to the point, and chock full of information. Both books are well-written, immediately useful, and filled with wonderful images. Check it all out!

Photographing from a Plane & the Dog Cloud

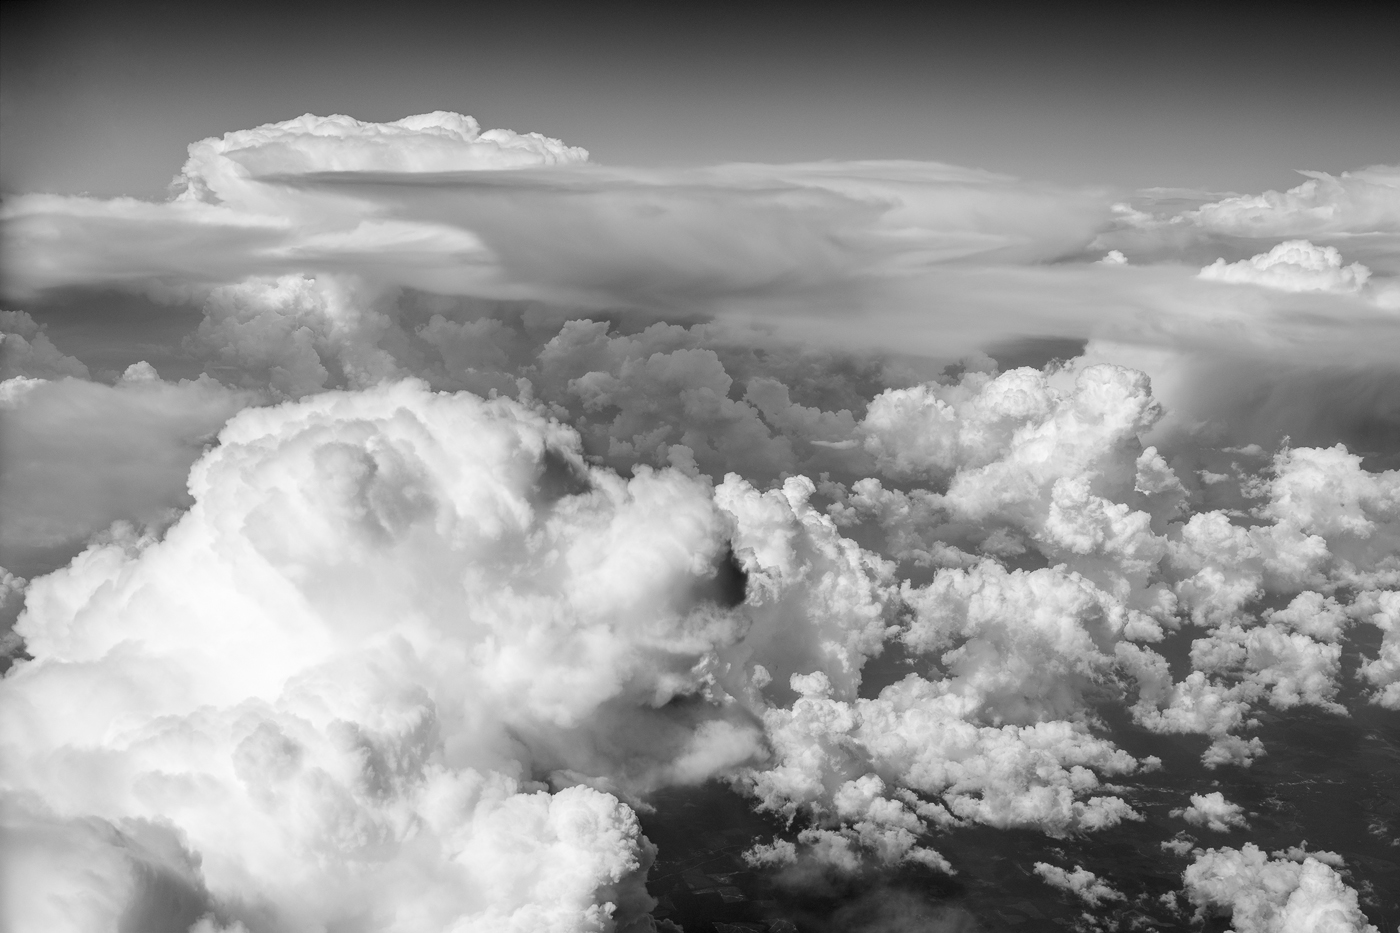
The Elusive Dog Cloud. (ZEISS Milvus 50mm f/2 macro on Nikon D850.)

The Elusive Dog Cloud. (ZEISS Milvus 50mm f/2 macro on Nikon D850.)

While I end up flying fairly often for work, I usually choose an aisle seat. They don’t seem as confining, and allow me to get up and move around if I choose. This is especially important on cross-country flights. But on a recent return flight to Atlanta from Los Angeles, I was able to get a window seat in first class on a new Delta Boeing 777-200LR. On this plane, there was only one lay-flat seat on each window side. It was the best of both worlds: window and aisle access all in one.

You can adjust your lay-flat seat into all kinds of positions. Since it moves and takes up so much room, each seat is in its own “pod”, surrounded by walls except for the opening to access it. While this is nice and private, the walls impede your direct access to most of the windows. (I found that only Row 5 had direct window access. I was in Row 4.)

Wanting to take advantage of window access to shoot with my new Nikon D850, I made sure to sit on the left side of the plane so it would be in shade most of the eastbound trip. I planned to use both my ZEISS 135mm f/2 Apo Sonnar T* and ZEISS Milvus 50mm f/2 macro lenses.

Right after takeoff from LAX, I noticed the pod wall made getting a DSLR and lens perpendicular to the window nearly impossible. Since this plane was meant for long flights at high altitudes (the flight preceding mine came in from Sydney, Australia), the multi-layered windows seemed particularly thick.

I had started with the 135mm lens, which was physically long enough to force me to hold the camera at an angle to the window. Even though the ZEISS 135mm lens is one of the sharpest ever made, I could never make a sharp image with it on the plane due to distortion from shooting at such an angle through the glass layers. I reluctantly abandoned it.

When I got home, I looked at the images on my desktop monitor, and saw just a narrow band of focus on each image I made with that lens. Focus rapidly dropped off in either direction from that narrow band. All those window layers had increasingly distorted the image the further away from the focus plane you looked.

Fortunately, I was just able to fit the D850 with the 50mm macro lens perpendicular to the window. Of course, if the lens was against the window, vibrations from the plane would have made every image blurry. So I had to hold it back just a little, while making sure to keep the window frame out of the photo. It was a tight fit, but I was able to get sharp images with this combination.

As we were approaching Atlanta, thunderstorms began to form. Our pilots zigzagged around them, which gave plenty of opportunities to photograph their incredible shapes. During one of our pivots, I saw and photographed the elusive Dog Cloud! Granted, it’s not quite as famous as Bigfoot, the Loch Ness Monster, or Elvis sightings. But being a dog lover, I was glad to prove it exists.

When shooting from aircraft, a fast shutter speed is required to compensate for vibrations on the plane and for the high speed of the plane. The closer your subject is to the plane, the faster your shutter speed needs to be. This photo was made at 1/800 second to make sure the relatively close Dog Cloud would remain sharp.

Shooting from commercial airliners has plenty of challenges, but is fun and can be rewarding.

Thom Hogan’s Nikon Complete Guides

Late summer 2001, I swapped my beloved Nikon F5 film camera for a Nikon D1x. While I had been dabbling in digital using a Nikon Coolpix 990 compact digital camera, the D1x was my first digital SLR. I had been keeping up with the Nikon DSLR developments through Thom Hogan’s website, and decided it was time to make the switch.

Of course, the fundamentals of using a camera (aperture, shutter speed, focusing, etc.) were the same between film and digital. But digital brought so many other tools and techniques to learn (white balance, instant review, histograms, blinking highlight warnings, etc.), I decided to take a workshop with Thom so I could start to master using a DSLR. It was a wise choice, as I came away from that workshop with a good working knowledge of my new camera.

Well, Thom didn’t stop with workshops. Since the earliest days of Nikon DSLRs, Thom has written a series of incomparable users manuals, which he justly calls “Complete Guides”. I download the fully searchable PDF e-books, then read them (and refer to them) on my iPad. They thoroughly explain every button, switch, wheel, and menu item in unsurpassed detail. If that’s all they did, they would be worth the read.

But they do much more. Thom suggests specific settings, and recommends against others, based on his long-time real-world use of the cameras. But, again, he does even more than that. For each recommendation, Thom discusses how and why those settings will affect your photography. These discussions allow you to understand what each function or setting does, why it does it, and how you can best use it. If you own a Nikon DSLR, whether FX or DX, I cannot recommend Thom’s guides highly enough.

  • Even though I’ve been shooting with a pair of Nikon D810’s for over a year (and with a fairly similar D800E before that), I’ve been looking forward to his D810 book all along. Well, it’s now here. Even if you’re an experienced Nikon owner, if you own a D810 (or any other Nikon DSLR), you owe it to yourself to buy and read Thom’s Guides.

    ThomHoganNikonD810ManualCover

    Here’s a link to his D810/D810A Guide: http://www.dslrbodies.com/books/bythom-complete-guides-/nikon-d810-guide.html. Any of his guides can be accessed with the link to his home page: http://www.bythom.com/.

    ©2015 Tom Vadnais Photography

  • NANPA Field Event in the Smokies

    From April 30 through May 3, 2015, NANPA (North American Nature Photography Association) hosted a Regional Field Event in the Great Smoky Mountains National Park (Smokies). I helped lead the event with my great friends Willard Clay and Bill Lea. Together, we have led many Smokies workshops over many years, and had a lot of fun with a most wonderful group.

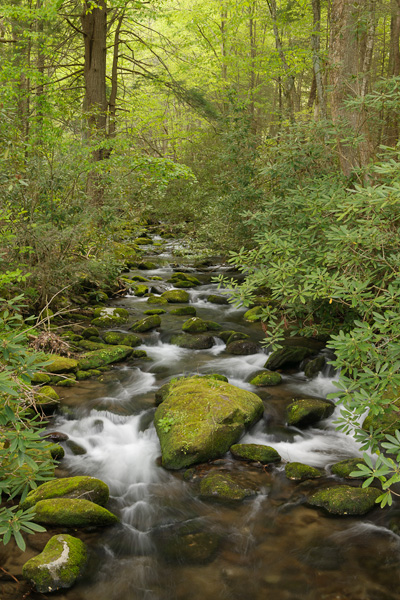
    Jakes Creek in Elkmont in the Smokies.

    Jakes Creek in Elkmont in the Smokies.

    We were based in Townsend, TN, known as The Quiet Side of the Smokies. Townsend is a wonderful little town just a 20 mile, half hour drive from the Knoxville airport. Our base, Talley Ho Inn is only about a mile from the Park entrance.

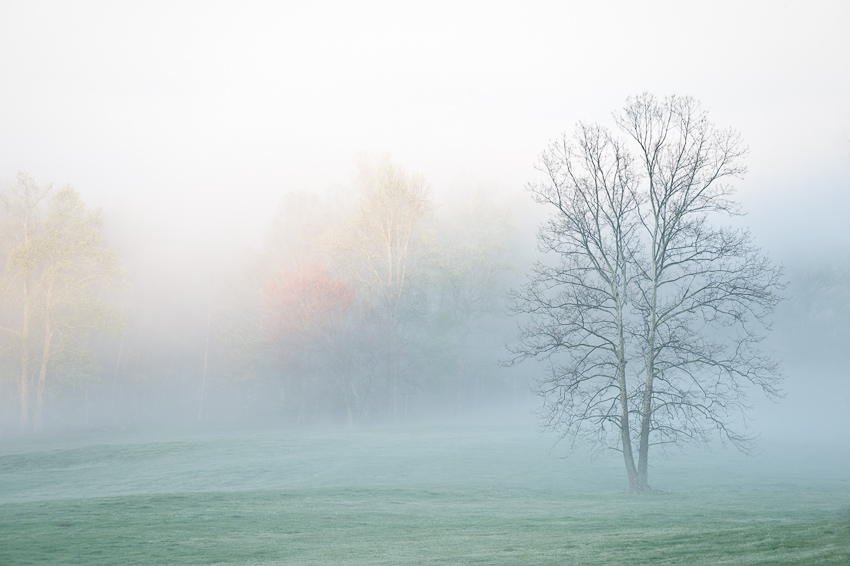
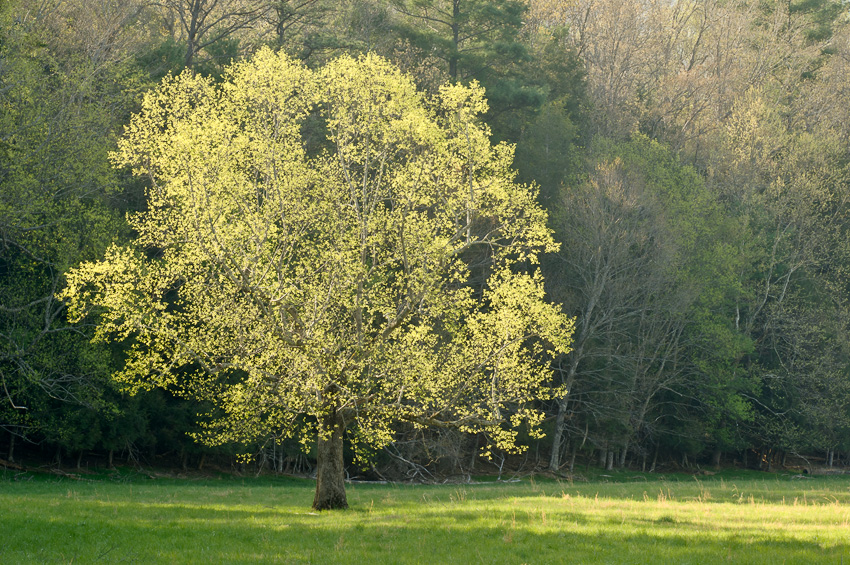
    Spring Tree in Fog in Cades Cove in the Smokies.

    Spring Tree in Fog in Cades Cove in the Smokies.

    This Field Event went from 5:00 PM Thursday evening at Talley Ho Inn and ran until the end of the optional critique session at 4:00 PM Sunday the 3rd. For more information on NANPA, including their Regional Field Events, check out this link: www.nanpa.org.

    Spring Tree in Cades Cove in the Smokies.

    Spring Tree in Cades Cove in the Smokies.

    This was a wonderful opportunity for participants to experience the most visited National Park in the country with three experienced nature photographers and teachers who have cumulatively led countless photo workshops in the Smokies over many years. All participants got to experience areas of the Park many of them had not even heard of.

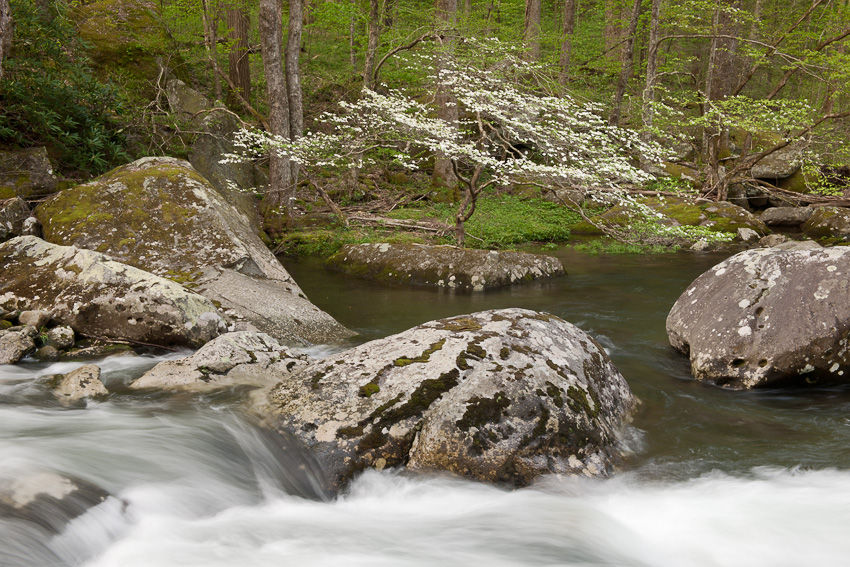
    Dogwood along the Middle Prong of Little River in the Smokies.

    Dogwood along the Middle Prong of Little River in the Smokies.

    Spring is a luscious time to photograph the Smokies. Photographic opportunities include all kinds of amazing wildflowers, plenty of waterfalls and cascades, and the classic receding mountain views. Among my favorites are the vivid and varying Spring greens that are everywhere. Deer, birds, wild turkeys, and even a couple black bears were there for the wildlife and bird photographers. And while not strictly nature, the fascinating historic buildings in Cades Cove and Elkmont were outdoor photography favorites.

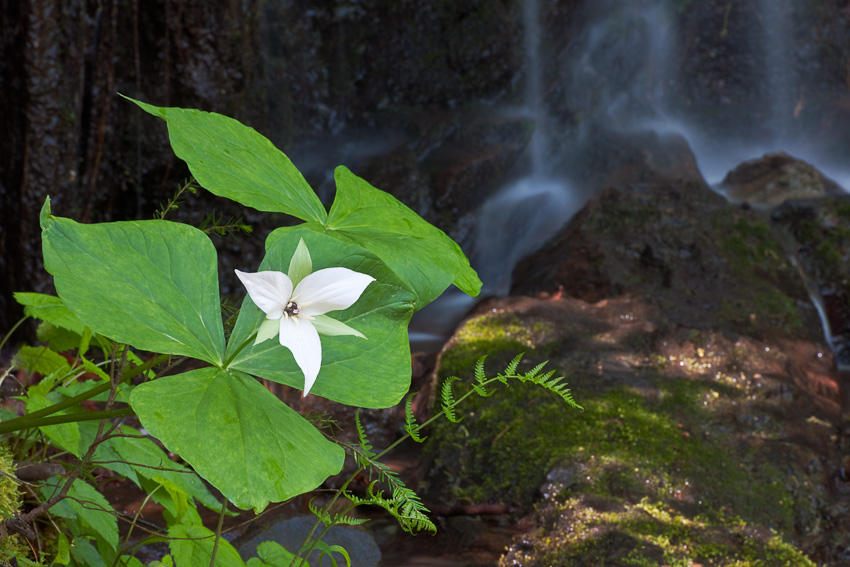
    Trillium and cascade along Tremont Road in the Smokies.

    Trillium and cascade along Tremont Road in the Smokies.

    Of course, Nature determined what we shot. Fortunately, She cooperated with us quite well. Areas we visited included Cades Cove, Elkmont, Tremont, and the Foothills Parkway overlooks.

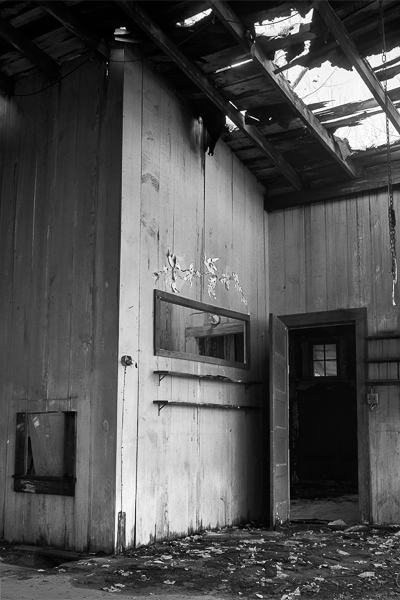
    Deteriorating Elkmont Cabin in the Smokies

    Deteriorating Elkmont Cabin in the Smokies

    Throughout the Field Event, the instructors gave an overview of every place we visited, along with specific suggestions of what to shoot there. We then worked with participants in the field, assisting wherever we could.

    Spring Colors from Foothills Parkway overlook near the Smokies.

    Spring Colors from Foothills Parkway overlook near the Smokies.

    If you missed it, you really should watch the NANPA website for future events. www.nanpa.org

    ©2015 Tom Vadnais Photography. All Rights Reserved.

    Go Back

    In recent posts, I have stressed the importance of making a photograph when you first encounter an interesting scene or subject. If you don’t shoot it right then, you may never have another opportunity. You might not ever make it back there, or the scene might change significantly. Of course, if you do go back, conditions will inevitably be different. You just hope they’ll be even better.

    Trying to get a better version of the photograph you first envisioned is a good reason to go back. But further exploration of the area is an even better reason.

    Many photographers seem to have a mental checklist of locations, or even of specific shots, that they want to capture. Once they go to that place or get that photo, they can check it off their list, then go on to the next scene, never to return. Continue reading

    Shoot It Now

    Old Chevrolet at Wil's Garage, Chama, NM

    Old Chevrolet at Wil’s Garage, Chama, NM

    Have you ever been out shooting and, for some reason or other, decide that even though the scene is worth working, you’ll just come back and do it later? I’ve found that rarely works out as hoped.

    In September 2014, I saw this old Chevrolet parked in front of this old garage in northern New Mexico. It looked like a scene that had been frozen in time—possibly for decades. What an opportunity!

    But…it was raining fairly hard on and off. And even during the rain, the overcast sky was pretty bright. Then every once in a while, the sun would peak through the broken clouds for a minute or so. This would cause the scene to be strongly backlit, losing all detail. But the image didn’t work from any other angle. Maybe I should just come back in better conditions.

    To add to my hesitations, I was supposed to be meeting my buddy Wes from Mesa, AZ, who was driving over for a week of photographing Fall color.

    It sure was tempting to just try to shoot it later. Continue reading

    Fall Colors in the Smokies Workshop with Willard Clay (and Me) – Oct. 18-21, 2013

    What could be better than being in the right place at the right time to capture the incredible Autumn colors in the Smokies, except to be there with enthusiastic fellow photographers, plus the expertise of four experienced photography teachers?

    Smokies Fall Color Over River

    Workshops through the Great Smoky Mountains Institute at Tremont are unique because they feature four instructors and lots of field work, plus practical classroom and post-processing time—all topped off with a fun critique of images made during the weekend. In addition to truly useful discussions and feedback about the images, the critique session features wine and cheese. And lots of laughs.

    Having four instructors guarantees you different points of view, and as much or as little individual assistance as you’d like throughout the entire weekend.

    Yours truly starts the weekend at 2:00 pm on Friday, October 18, with a discussion of field equipment and techniques to ensure that you can capture the images you intend.

    I also end the long weekend with a couple hours of post-processing instruction from 10:00 through noon on Monday, October 21. Using images made during the weekend, we discuss and demonstrate techniques you can use to get the most out of your images—not that yours need much at all, of course!

    As a special attraction this Fall, we’re going to have a raptor shoot at the Tremont campus for anyone who wants to participate.

    The entire weekend, including field and classroom instruction, dorm room, and all food is only $611! Even transportation to the field locations is included, if you’d like. That’s quite a bargain.

    There is a limit on the number of participants so we can keep the student/instructor ratio small, so reserve your place today. You’ll soon see why so many people come back each year.

    For more information, and to register, please check out this site: http://www.gsmit.org/fallphoto.html.

    ©2013 Tom Vadnais Photography. All Rights Reserved.