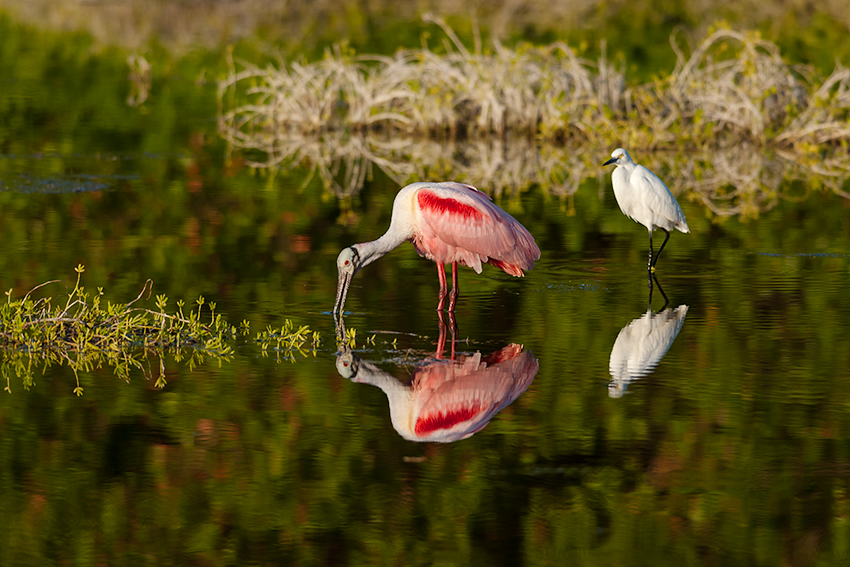
Thanks to Bill Lea, in February I visited Everglades National Park for the first time as one of the co-leaders of the NANPA Regional Event there. This is the first of two posts about what I learned during that trip.
Before I saw Bill’s photographs for his forthcoming book, I hadn’t thought too seriously about shooting in the Everglades, despite how relatively close the Park is to Atlanta. It seemed like a flat, grassy, swampy area, where the big attractions are birds and critters. I don’t typically shoot birds and critters, nor flat, grassy, swampy areas. It didn’t sound like much of a destination for a landscape and travel photographer. Boy, was I ever wrong.
Fortunately, for several days before the Event, Bill gave us an extensive (and photographically rewarding) tour of the Park, based on his five years of photographing there. I would never have figured out nor enjoyed the Everglades as quickly without Bill’s expert guidance. I found birds and critters fun and challenging to shoot (especially with my equipment), and found the landscape remarkably variable and beautifully photogenic. Now I can’t wait to go back.
As an aside, living with Atlanta traffic, I misunderstood the concept of traveling to a park to shoot birds. During any given rush hour here, you could see so many birds shot within such a short time that it gets old pretty quick. But I get it now.
Believe it or not, just like in many other parks, there are signs denoting elevations in the Everglades. Unlike my experiences in some of the Western parks, however, it wasn’t any harder to breathe even at the highest elevations. I felt pretty much the same at the Elevation 4 Feet sign as I had earlier at the Elevation 3 Feet sign. Guess I’ve stayed in pretty good shape.
My first morning in the Park started with a sunrise shoot over Florida Bay at Flamingo. So far so good. I’m in my comfort zone with my lenses, geared tripod head, focusing cloth, remote release, and the rest of my usual landscape kit.
Sun’s fully up now, so landscape photography is done. It’s off to nearby Eco Pond to shoot birds. Hey, these bloody things move! What’s up with that? And they’re relatively small. And relatively far away. And just as soon as I compose my shot, it’s either changed or gone. There goes my comfort zone.
Good thing I brought my trusty old Nikon 300mm f/4 lens and my 1.7x teleconverter, I thought. On a full frame camera, that’s a reach of 510mm. Temporary euphoria. But very quickly, I discovered you need more than just focal length.
Take a glacially slow f/4 autofocus lens, slow it down more by adding a teleconverter, and you’ll soon discover that glaciers are the only moving things you can successfully track using dynamic autofocus with this setup. Many times, autofocus just wouldn’t work at all. I soon ended up back with manual focus in my attempts to track birds, whether flying or just moving around. This actually worked okay. Sometimes. Well, a few times.
While it’s completely obvious and expected, or at least it should have been, the depth of field at 510mm on a full frame camera is quite small. Two birds across the pond would rarely both be in focus if one was even slightly in front of the other. Even stopping down didn’t help much. Of course, stopping down requires much slower shutter speeds (but the subjects move) or much higher ISO (which increases noise). But even if you can get the shutter speed and ISO settings to work, you don’t want the backgrounds to be in focus, so you don’t want to stop down too much. It’s an interesting series of compromises. You really start looking for birds lining up in the same plane, which they apparently don’t like doing.
After only a half day (I’m a fast learner), I realized why I was the only one on the shore without a faster long lens. Good thing it was hidden under my focusing cloth most of the time.
Here’s a good place to mention another landscape shooter’s custom that doesn’t work at all with birds and critters. I always use mirror lock-up. In that mode, when you click the shutter the first time, the mirror raises and locks out of the way of the shutter. After a pause, you click the shutter again to actually make the picture. With birds or critters, of course, that guarantees they will be out of your frame before an image is captured. It only took me one attempt before changing that setting.
Good news interlude: I did capture an image of a swimming crocodile. But just one, as I spent too much time fussing with my geared tripod head. More on that later.
Okay, there are certain camera settings and lens criteria to pay attention to. But the rest of your camera kit can be pretty much the same. Or not.
Although I use fill flash in my work for all of my accident vehicle photographs, I don’t even carry a flash with me when I travel for my personal photography, whether the intended subjects are travel or landscape. For birds and wildlife, many experienced photographers use a flash with an extender like a Better Beamer to counter dark shadows and to add a catch light in their subject’s eye. Perhaps needless to say, I didn’t have my flash with me for this trip. Fortunately, conditions were bright enough that the flash didn’t seem necessary.
Okay, so I didn’t have the right lens and didn’t have my flash. Unfortunately, my equipment story doesn’t end here, even though this post does. In Part Two, I will talk of tripod heads, focusing cloths, and remote releases.


