When converting a RAW image file (and you are shooting RAW, right?), you have a choice of color spaces and bit depths to work in. Unless you’re not going to do any post-processing, and are only making a JPEG, you should work in 16-bit. (Hmmmmm, this might be the subject of a future post. For now, just trust me.)
Just as strong a recommendation can be made for using the ProPhoto color space. When converting a RAW image, the most common color spaces used, from smallest to largest, are sRGB, Adobe RGB 1998, and ProPhoto. If you shoot RAW, your image doesn’t have a color space assigned until you process it in your RAW converter of choice. (Yes, even if you set your camera’s color space to sRGB or Adobe RGB 1998, that only applies to JPEGs. The RAW images won’t have any color space embedded.)
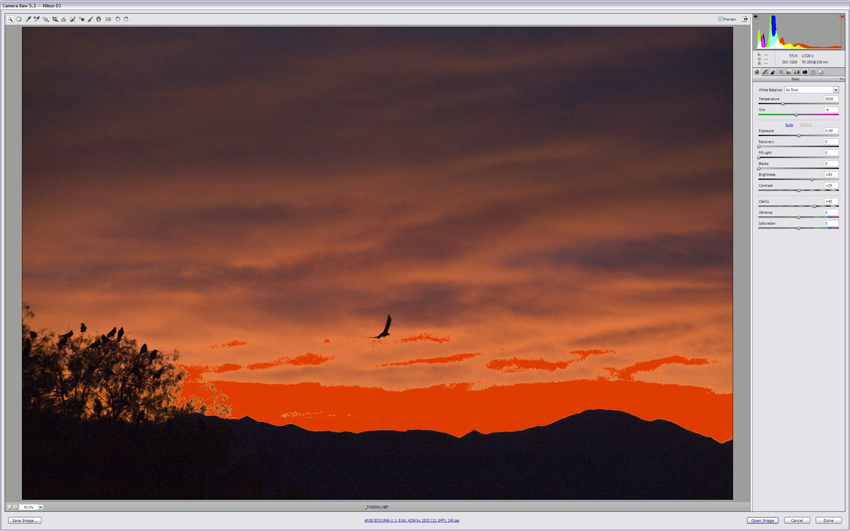
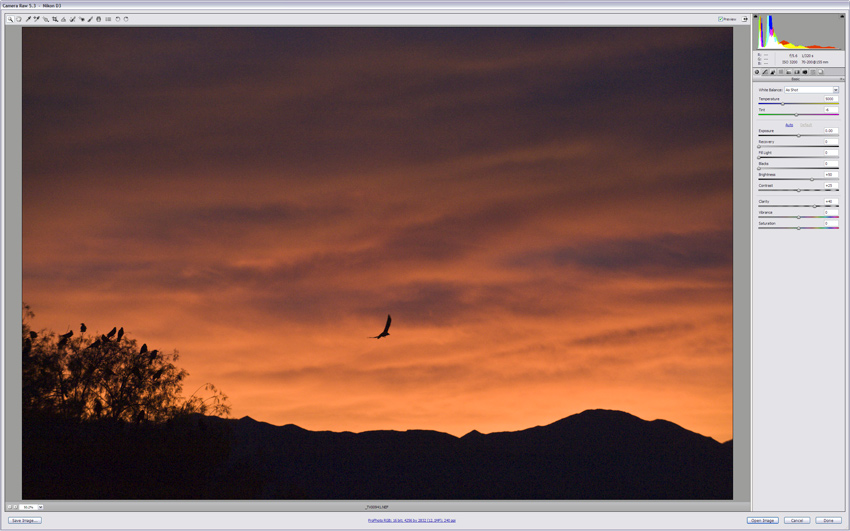
There are plenty of good technical explanations available on the web and in books to prove why this is so. But to save 3,000 words, here are three screen shots from Adobe Camera Raw (ACR) that should show the benefits of working in the largest space.
The first screen shot shows an image made at sunset, with an intense orange sky. When sRGB color space (the smallest) was chosen, a large area of bright red highlight warning dominates the image. (That bright red is the highlight warning in ACR; it’s not in the image itself.)

sRGB Color Space (8-bit). (Click on image to enlarge, then click again to scroll through all three.)
When Adobe RGB 1998 color space was chosen, the area with the highlight warning was greatly reduced. This is because it is a much larger color space than sRGB. (Bit depth and color space are independent, so either 8-bit or16-bit bit depths can be used with Adobe RGB 1998 without any effect on the gamut.)
By converting the image to the largest color space, ProPhoto, there were no pixels in the highlight warning zone, so the red warning disappeared. (ProPhoto images should be in 16-bit.)

ProPhoto Color Space (16-bit). (Click on image to enlarge, then click again to scroll through all three.)
Converting your RAW images to ProPhoto and 16-bit will give you the most data possible to work with in Photoshop.
(Just remember: When you’ve finished all your adjustments and saved your Master File, you’ll have to flatten the image, convert to sRGB, and change the image mode to 8-bits if you intend to make a JPEG. More on that to come….)
So once again, bigger is better. As far as bit depth and color space go, that is.

