Category Archives: Travel

The Recency Effect, So Don’t Delete

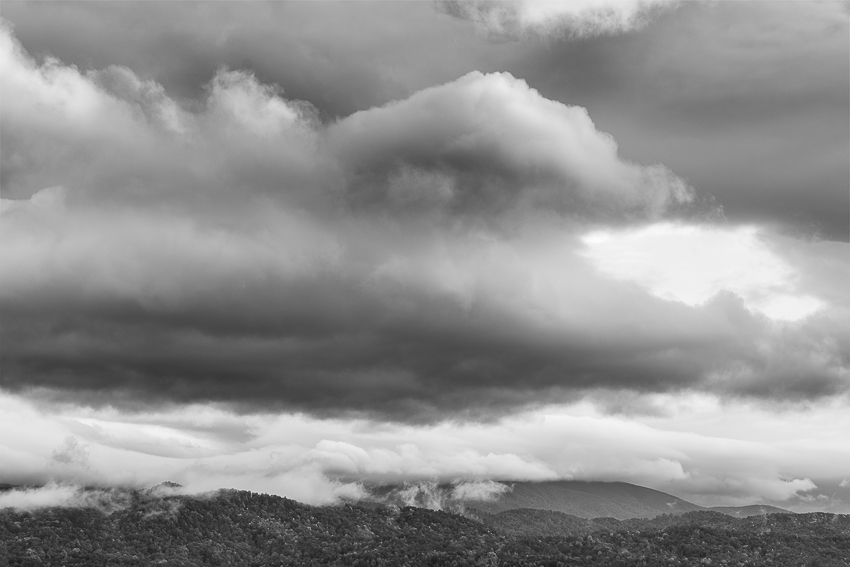
Foothills Parkway, Smokies. (ZEISS Otus 85mm f/1.4 on Nikon D810.)

Foothills Parkway, Smokies. (ZEISS Otus 85mm f/1.4 on Nikon D810.)

I made this image in October 2015, but never thought of it again until December 1, 2017. Why did I let it languish? Obviously, the scene struck me enough to make the photograph. But I can’t explain why it took two years to do something with it.

Often, when I come back from a trip, I’m initially disappointed with the collection of images I made. Sure, I’ll have a couple I’ll send to friends to show where I’ve been shooting, but they’re not anything great. Later (and sometimes much later), I reluctantly look through them again, and am pleasantly surprised to find a couple, or even a few, images I really like. That’s always a fun discovery.

How about you? How many times have you gone back through your older, forgotten images and wondered why you hadn’t done anything with a specific image? Or, more poignantly, not only do you not remember making that image, but don’t even remember seeing an image like it before? Yet you made it!

Or how about the opposite effect? Several of my photo friends come back from a week shooting, and struggle for a few days to get down to their top 100 favorites from that trip. Ask them again in a couple months, and they’ll tell you they didn’t get anything at all from that very same trip!

What in the world is going on? That phenomenon is often called the recency effect. It can affect photographers in different ways—initially for good or bad. For some, their most recent images are all masterpieces, and they have a hard time choosing just a couple to show. But then, they lose interest in most of them. Others, like me, after an initial period of disappointment, find images they come to really like out of what seemed like a batch of rejects.

This leads to an important point. DON’T EVER delete images that don’t resonate with you the first time you see them. You made them for a reason. Let them simmer, and revisit them on occasion. You might be pleasantly surprised what’s already in your files.

Old Car City USA, White, GA

In late June 2007, I stopped by an old junkyard called Old Car City USA just off US-411 in White, GA. I asked owner Dean Lewis if I could make some photos there. He said okay, just be careful. It was overgrown, and there were no trails as such, as it was a working junk yard for older cars. While there, I made this detail photo of a 1948 Hudson:

1948 Hudson at Old Car City USA. (Nikkor 28-70mm on Nikon D1x.)

1948 Hudson at Old Car City USA. (Nikkor 28-70mm on Nikon D1x.)

The next day, I returned with a friend. Dean again welcomed us in to shoot, with no charge either day. A couple years later, I stopped by again to ask about bringing some photographers from a camera club for an outing. Dean again said okay, and it would be $10 each. He also told me he was converting Old Car City USA from a working junkyard to an old car junkyard museum, and would be charging admission. What a great idea to preserve a unique place.

In November 2017, I went back with a couple friends from out of town. It’s now $25 for photographers, and is a bargain. Dean has completely transformed Old Car City USA from overgrown junkyard to photographer’s paradise with about seven miles of trails through nearly 4,000 cars! Many of you will have heard of Old Car City USA, as it has been featured in many websites, news articles, and television shows. Countless photographers have also held workshops there. It’s a truly wonderful place. Here’s a link to Old Car City USA: http://oldcarcityusa.com/

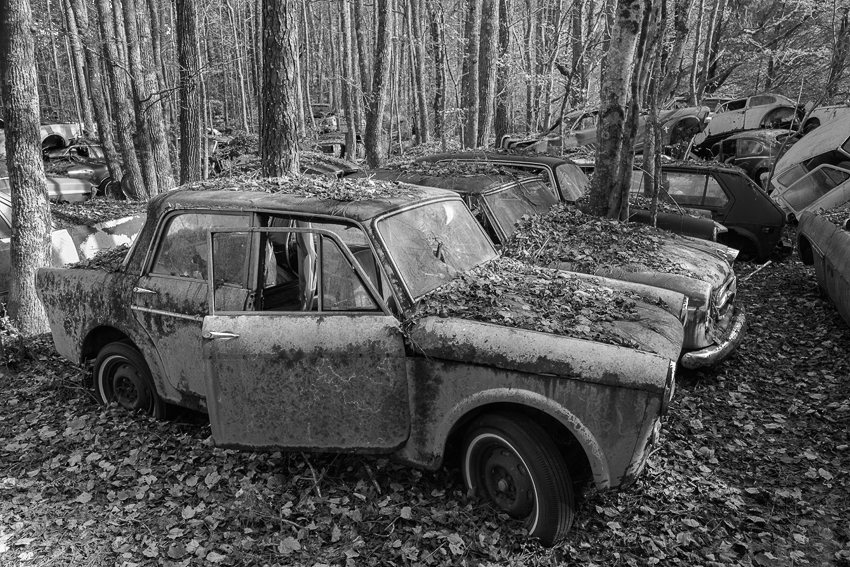
Trabant & Others. Old Car City USA, White, GA. (ZEISS Milvus 25mm f/1.4 on Nikon D850.)

Trabant & Others. Old Car City USA, White, GA. (ZEISS Milvus 25mm f/1.4 on Nikon D850.)

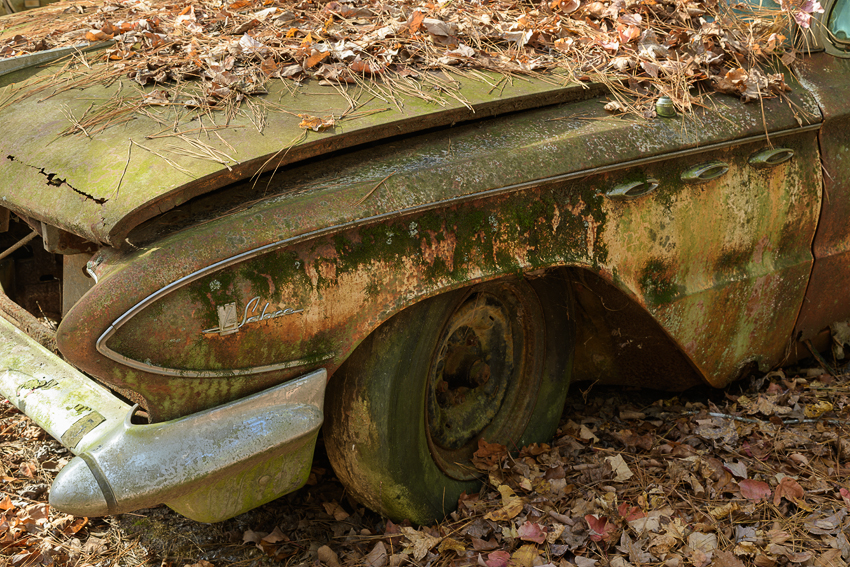
Buick LaSabre in Old Car City USA. (ZEISS Milvus 50mm f/2 macro on Nikon D850.)

Buick LaSabre in Old Car City USA. (ZEISS Milvus 50mm f/2 macro on Nikon D850.)

My friends and I stayed most of the day, and shooting there only made me want to go back. I intend to return often for the amazing photographic potentials and the riveting history there. There is also a gallery of Dean’s unique art, along with other collections all around. I’ve included several images from there in my new Trains, Planes, & Automobiles gallery. http://tomvadnais.com/?page_id=352

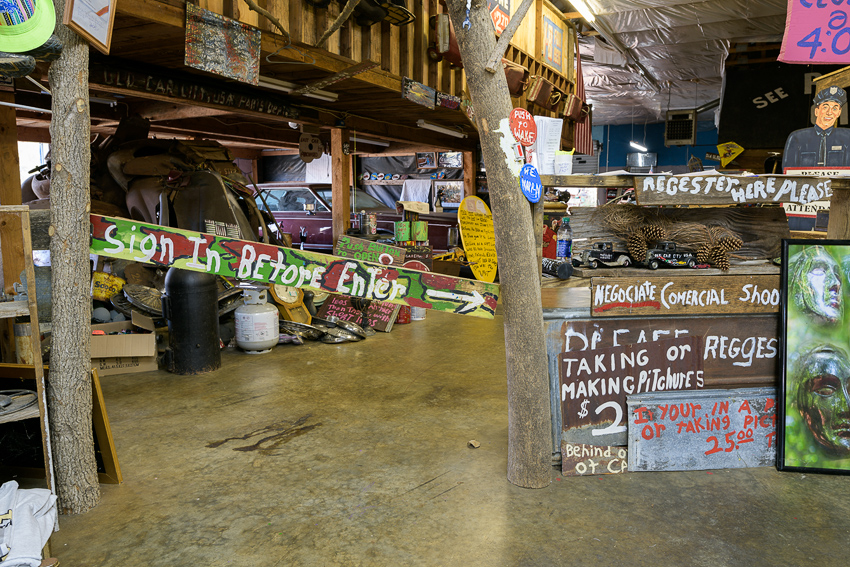
After you pay the fee at the entrance, this gate allows passage into the yard. Note the red button you must push to enter. It’s actually just a painted round wood piece nailed onto the sign. My kind of humor.

Old Car City USA Entrance. Note Push Button to Enter. (ZEISS Milvus 25mm f/1.4 on Nikon D850.)

Old Car City USA Entrance. Note Push Button to Enter. (ZEISS Milvus 25mm f/1.4 on Nikon D850.)

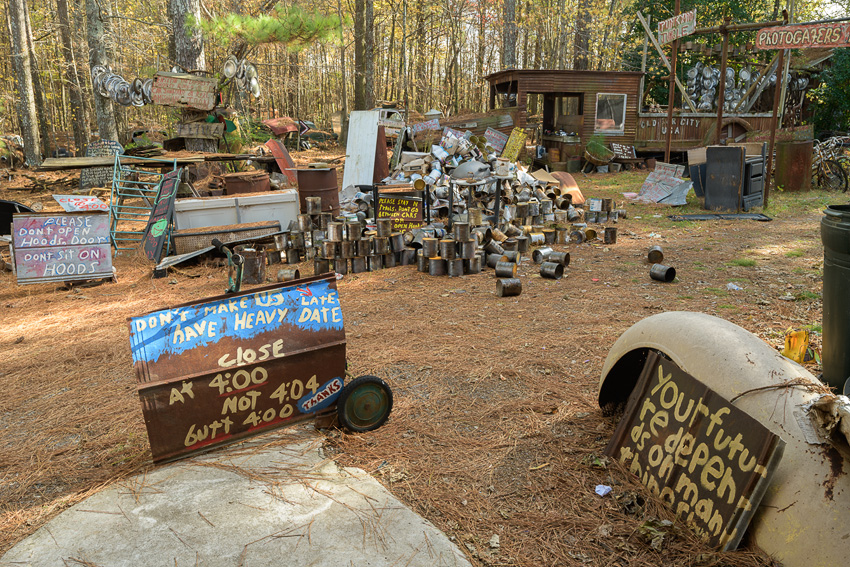
I’ve always had a fondness for both intentionally and unintentionally funny signs. Old Car City USA is a gold mine for signs. I can’t recommend Old Car City highly enough. You’ll never find another place like it. Give yourself plenty of time, and make sure you talk with Dean. He’s a great guy with the best stories.
Old Car City USA Signs. (ZEISS Milvus 25mm f/1.4 on Nikon D850.)

Old Car City USA Signs. (ZEISS Milvus 25mm f/1.4 on Nikon D850.)

You Can’t Control Mother Nature

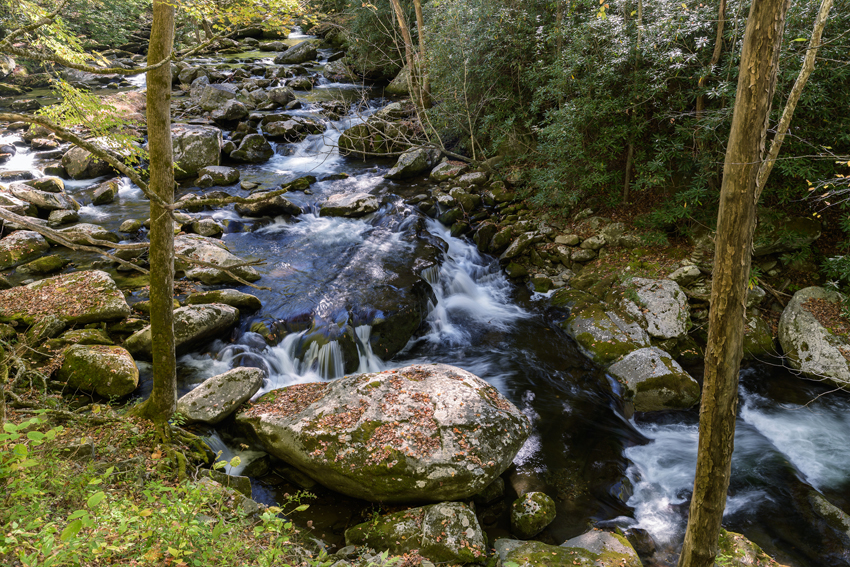
While scouting in preparation for our Great Smoky Mountains Institute at Tremont (GSMIT http://gsmit.org/photography-workshops/} fall photography workshop, I visited one of my favorite cascades to make sure it would be a good place to bring the participants. This first photograph was made on Thursday, October 19, 2017—the day before the workshop was to begin. Water levels were so low, that even the full bottle of water I had with me wouldn’t help the situation! No rain was forecast until the last day of the workshop. Obviously, we’d have to find other subjects to shoot.

Tremont Cascade 10/19/17, (ZEISS Otus 28mm f/1.4 on Nikon D850.)

Tremont Cascade 10/19/17, (ZEISS Otus 28mm f/1.4 on Nikon D850.)

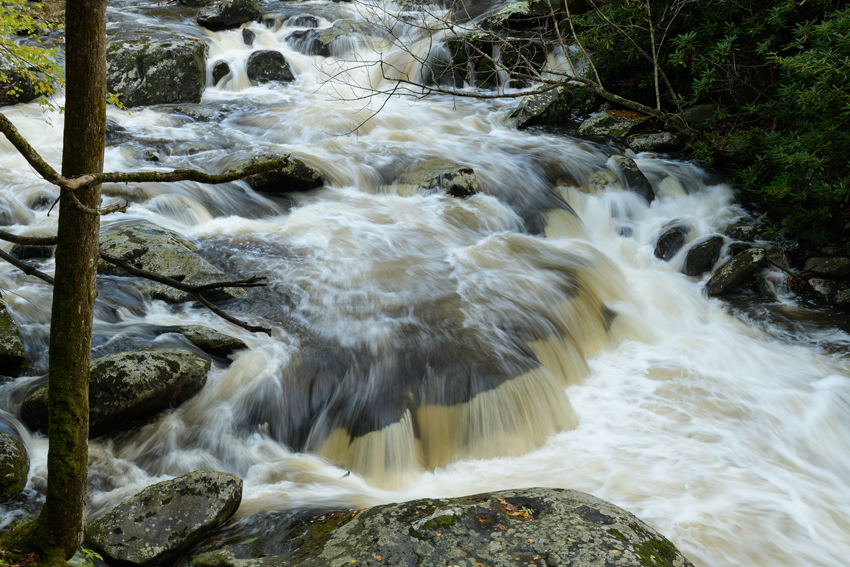
It poured rain overnight Sunday, October 22, and continued through when the workshop ended mid-day Monday. Monday afternoon, I returned to the cascade. This time, it was almost overflowing with silt-filled water. Still not photogenic.

Tremont Cascade 10/23/17. (ZEISS Milvus 50mm f/2 macro on Nikon D850.)

Tremont Cascade 10/23/17. (ZEISS Milvus 50mm f/2 macro on Nikon D850.)

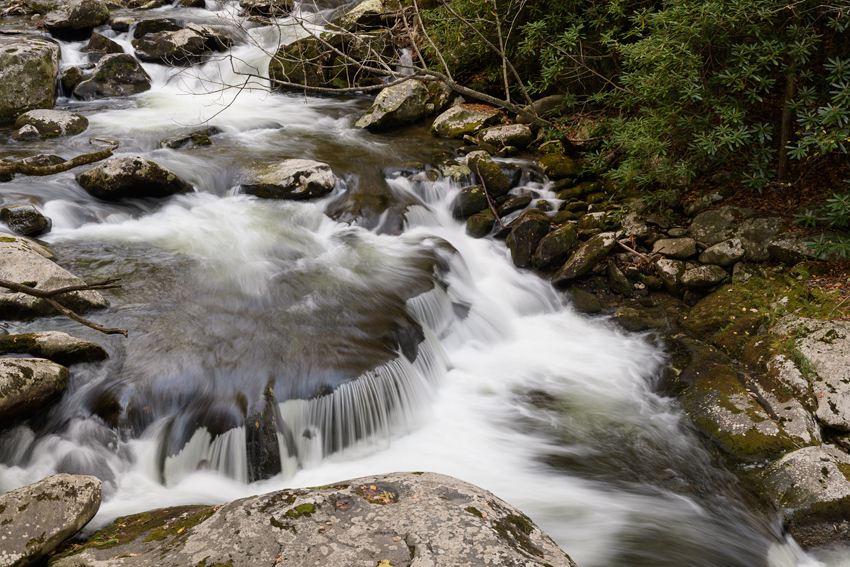
Water levels change rapidly in the Smokies, and by the next day, the water was clear and at nearly perfect levels and flow rates.
Tremont Cascade 10/24/17. (ZEISS Milvus 50mm f/2 macro on Nikon D850.)

Tremont Cascade 10/24/17. (ZEISS Milvus 50mm f/2 macro on Nikon D850.)

These were good reminders that landscape and nature photographers are completely reliant on Mother Nature for the conditions we face. We must incorporate whatever water levels, fall color changes, light, clouds, fog, wind, rain, snow, dust, drought, fire, etc., we encounter. That’s why it’s so difficult to duplicate an image we’ve either made or seen before. It’s also why we need to remain flexible when we go out to shoot.

A Dark Cover-up

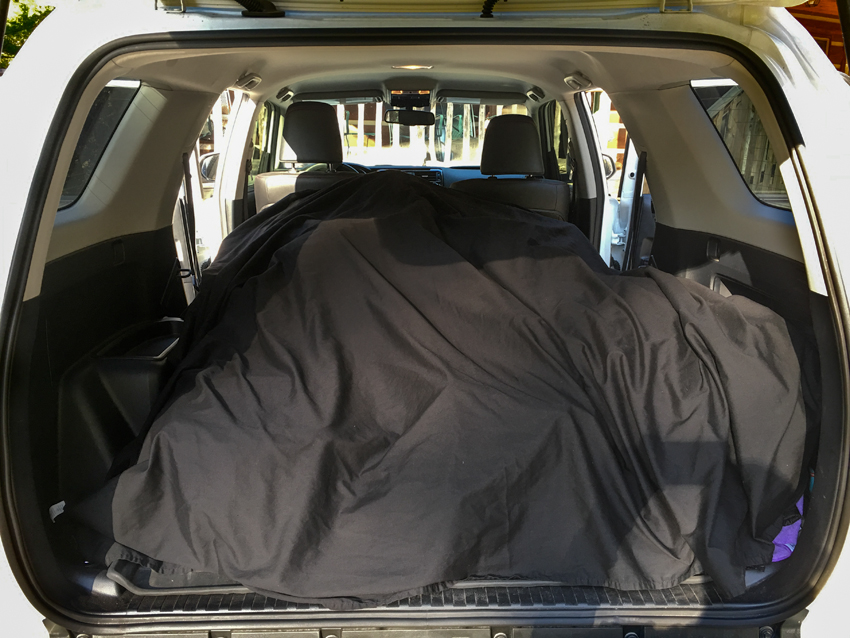
When I travel for a work or a personal photography trip, I either drive my 4Runner TRD Pro or rent an SUV so I can easily access my gear in the field. Years ago, my friend and mentor Bruce Dale suggested a cheap, easy way to keep prying eyes from cargo and luggage in the back. It’s a black flat bed sheet. I bought two of them at Walmart; one for my 4Runner and one to keep packed in my travel bag. They’ve become the black sheets of my family. (Sorry, couldn’t resist.)

Black Sheet Over Gear

Black Sheet Over Gear

If I’m going to be hiking any distance when I get to my shooting location, I try not to keep valuables in my vehicle, if possible. But I’ll still cover extra jackets, water, snacks, or empty camera bags or luggage. I find the black sheet most useful when going to and from my shooting location, the airport, meals, the hotel, and when stopping at any store or gas station. It’s cheap, simple deterrence. I even use it day-to-day when I’m at home.

Photographing from a Plane & the Dog Cloud

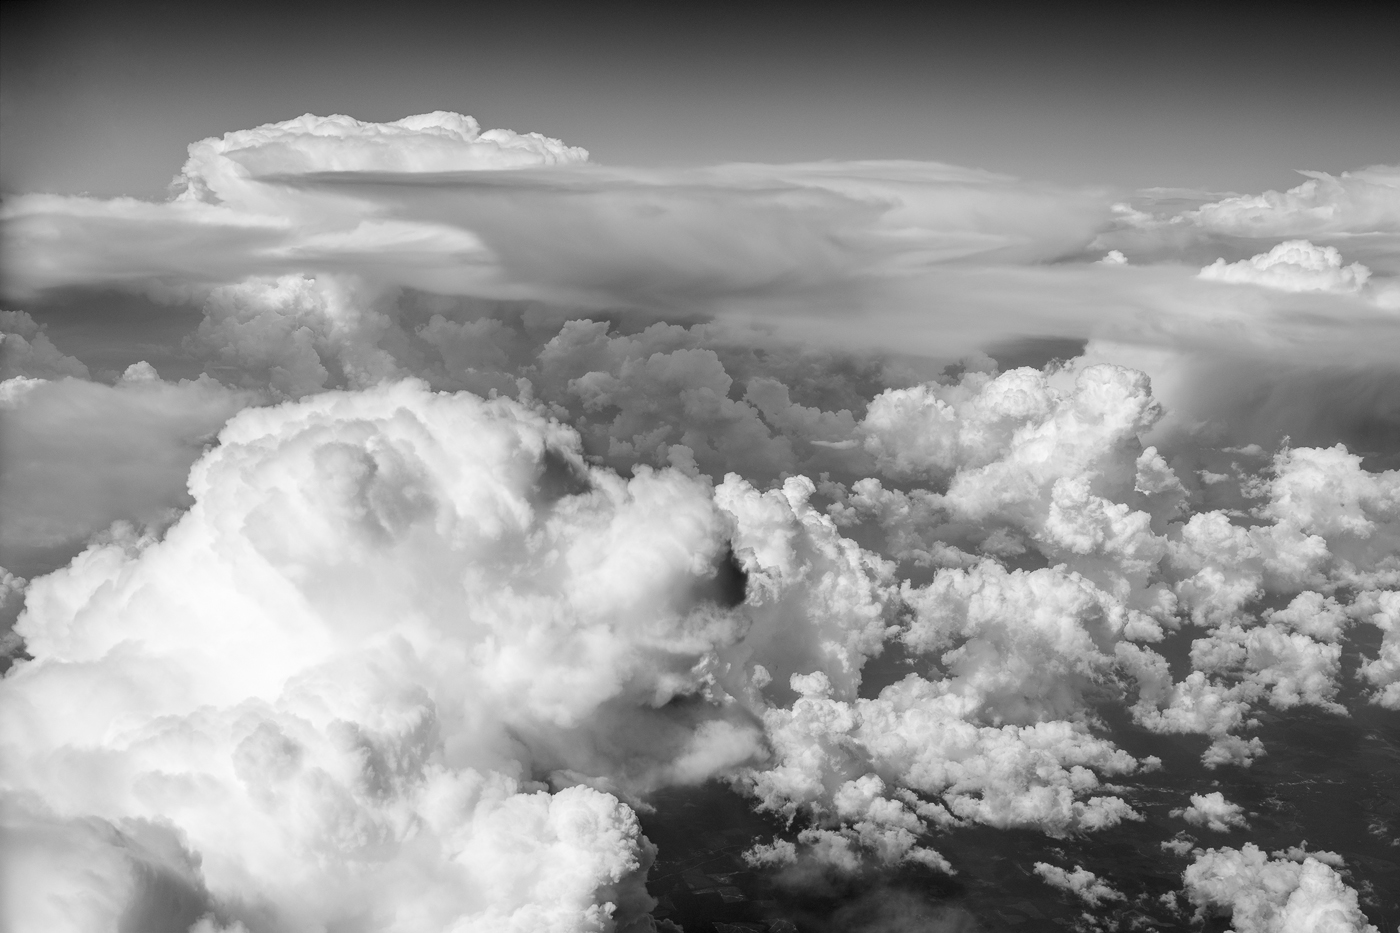
The Elusive Dog Cloud. (ZEISS Milvus 50mm f/2 macro on Nikon D850.)

The Elusive Dog Cloud. (ZEISS Milvus 50mm f/2 macro on Nikon D850.)

While I end up flying fairly often for work, I usually choose an aisle seat. They don’t seem as confining, and allow me to get up and move around if I choose. This is especially important on cross-country flights. But on a recent return flight to Atlanta from Los Angeles, I was able to get a window seat in first class on a new Delta Boeing 777-200LR. On this plane, there was only one lay-flat seat on each window side. It was the best of both worlds: window and aisle access all in one.

You can adjust your lay-flat seat into all kinds of positions. Since it moves and takes up so much room, each seat is in its own “pod”, surrounded by walls except for the opening to access it. While this is nice and private, the walls impede your direct access to most of the windows. (I found that only Row 5 had direct window access. I was in Row 4.)

Wanting to take advantage of window access to shoot with my new Nikon D850, I made sure to sit on the left side of the plane so it would be in shade most of the eastbound trip. I planned to use both my ZEISS 135mm f/2 Apo Sonnar T* and ZEISS Milvus 50mm f/2 macro lenses.

Right after takeoff from LAX, I noticed the pod wall made getting a DSLR and lens perpendicular to the window nearly impossible. Since this plane was meant for long flights at high altitudes (the flight preceding mine came in from Sydney, Australia), the multi-layered windows seemed particularly thick.

I had started with the 135mm lens, which was physically long enough to force me to hold the camera at an angle to the window. Even though the ZEISS 135mm lens is one of the sharpest ever made, I could never make a sharp image with it on the plane due to distortion from shooting at such an angle through the glass layers. I reluctantly abandoned it.

When I got home, I looked at the images on my desktop monitor, and saw just a narrow band of focus on each image I made with that lens. Focus rapidly dropped off in either direction from that narrow band. All those window layers had increasingly distorted the image the further away from the focus plane you looked.

Fortunately, I was just able to fit the D850 with the 50mm macro lens perpendicular to the window. Of course, if the lens was against the window, vibrations from the plane would have made every image blurry. So I had to hold it back just a little, while making sure to keep the window frame out of the photo. It was a tight fit, but I was able to get sharp images with this combination.

As we were approaching Atlanta, thunderstorms began to form. Our pilots zigzagged around them, which gave plenty of opportunities to photograph their incredible shapes. During one of our pivots, I saw and photographed the elusive Dog Cloud! Granted, it’s not quite as famous as Bigfoot, the Loch Ness Monster, or Elvis sightings. But being a dog lover, I was glad to prove it exists.

When shooting from aircraft, a fast shutter speed is required to compensate for vibrations on the plane and for the high speed of the plane. The closer your subject is to the plane, the faster your shutter speed needs to be. This photo was made at 1/800 second to make sure the relatively close Dog Cloud would remain sharp.

Shooting from commercial airliners has plenty of challenges, but is fun and can be rewarding.

NANPA Field Event in the Smokies

From April 30 through May 3, 2015, NANPA (North American Nature Photography Association) hosted a Regional Field Event in the Great Smoky Mountains National Park (Smokies). I helped lead the event with my great friends Willard Clay and Bill Lea. Together, we have led many Smokies workshops over many years, and had a lot of fun with a most wonderful group.

Jakes Creek in Elkmont in the Smokies.

Jakes Creek in Elkmont in the Smokies.

We were based in Townsend, TN, known as The Quiet Side of the Smokies. Townsend is a wonderful little town just a 20 mile, half hour drive from the Knoxville airport. Our base, Talley Ho Inn is only about a mile from the Park entrance.

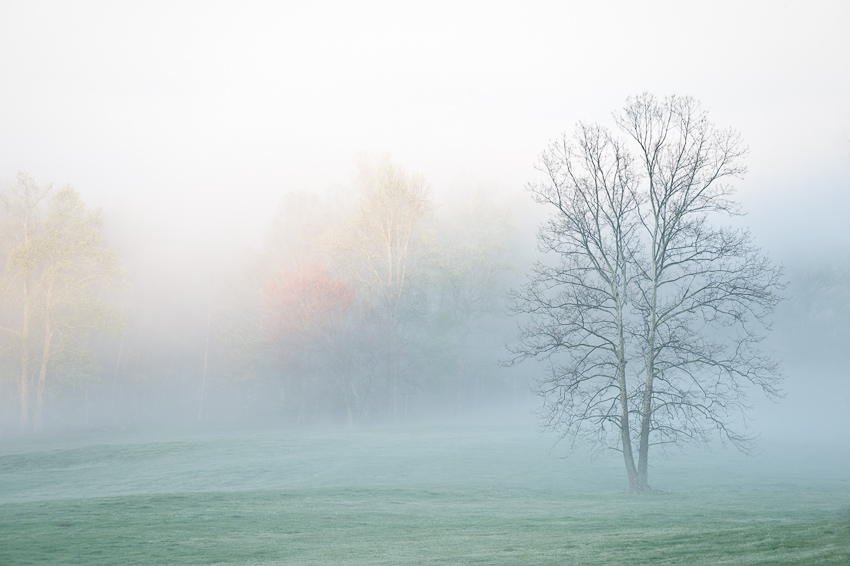
Spring Tree in Fog in Cades Cove in the Smokies.

Spring Tree in Fog in Cades Cove in the Smokies.

This Field Event went from 5:00 PM Thursday evening at Talley Ho Inn and ran until the end of the optional critique session at 4:00 PM Sunday the 3rd. For more information on NANPA, including their Regional Field Events, check out this link: www.nanpa.org.

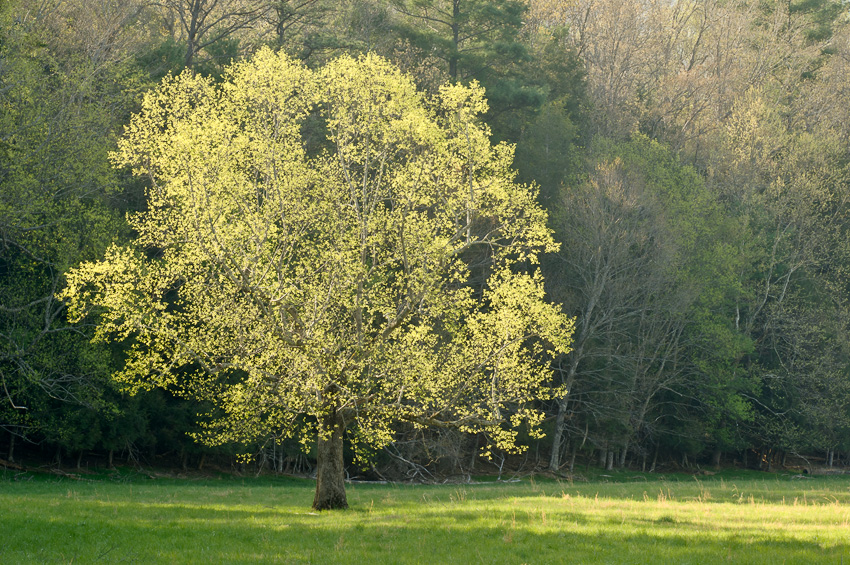
Spring Tree in Cades Cove in the Smokies.

Spring Tree in Cades Cove in the Smokies.

This was a wonderful opportunity for participants to experience the most visited National Park in the country with three experienced nature photographers and teachers who have cumulatively led countless photo workshops in the Smokies over many years. All participants got to experience areas of the Park many of them had not even heard of.

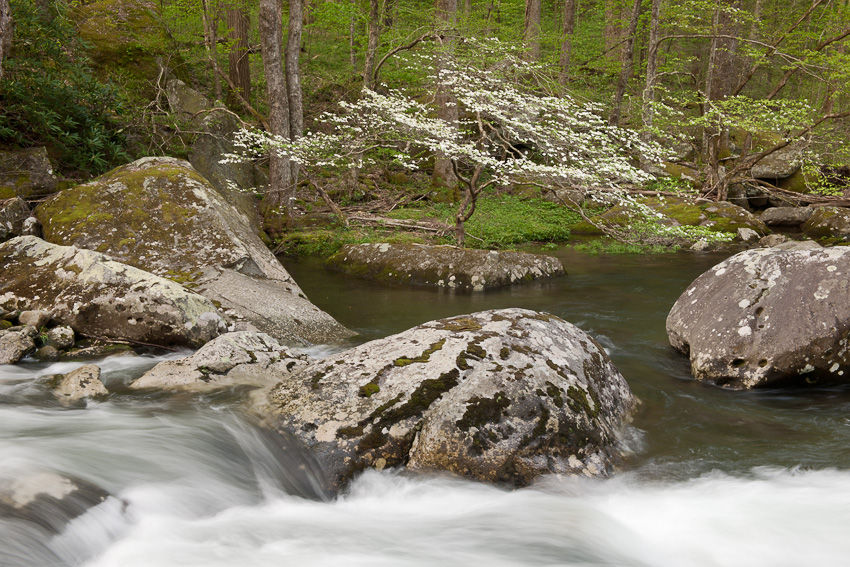
Dogwood along the Middle Prong of Little River in the Smokies.

Dogwood along the Middle Prong of Little River in the Smokies.

Spring is a luscious time to photograph the Smokies. Photographic opportunities include all kinds of amazing wildflowers, plenty of waterfalls and cascades, and the classic receding mountain views. Among my favorites are the vivid and varying Spring greens that are everywhere. Deer, birds, wild turkeys, and even a couple black bears were there for the wildlife and bird photographers. And while not strictly nature, the fascinating historic buildings in Cades Cove and Elkmont were outdoor photography favorites.

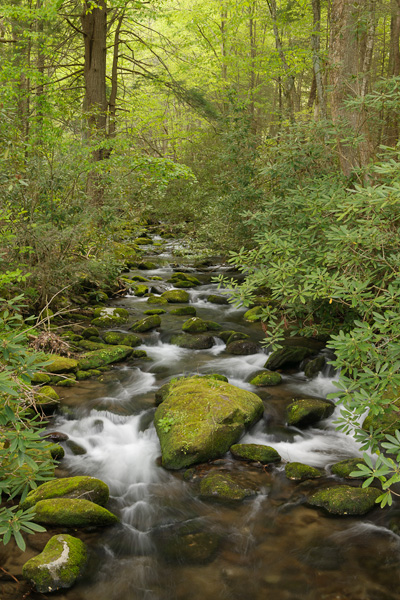
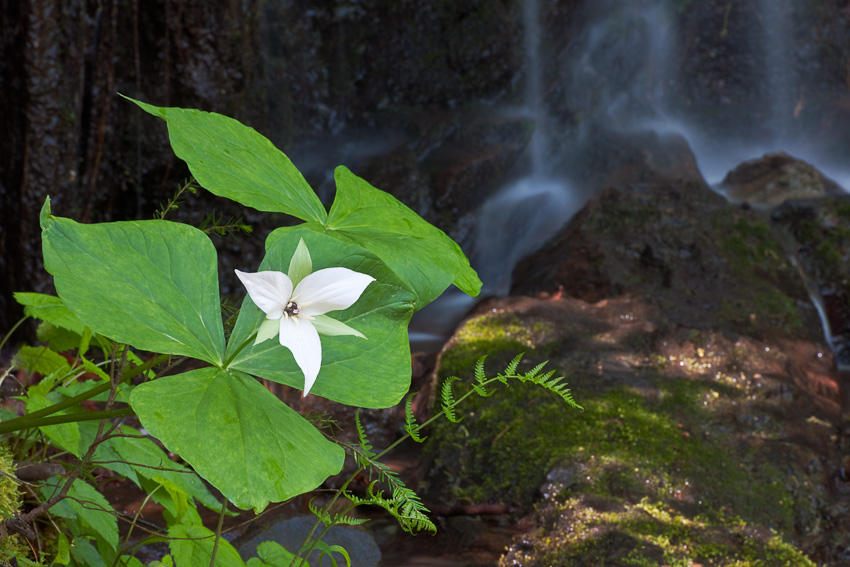
Trillium and cascade along Tremont Road in the Smokies.

Trillium and cascade along Tremont Road in the Smokies.

Of course, Nature determined what we shot. Fortunately, She cooperated with us quite well. Areas we visited included Cades Cove, Elkmont, Tremont, and the Foothills Parkway overlooks.

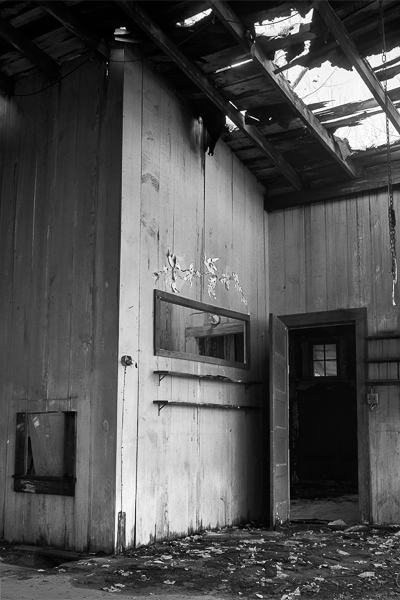
Deteriorating Elkmont Cabin in the Smokies

Deteriorating Elkmont Cabin in the Smokies

Throughout the Field Event, the instructors gave an overview of every place we visited, along with specific suggestions of what to shoot there. We then worked with participants in the field, assisting wherever we could.

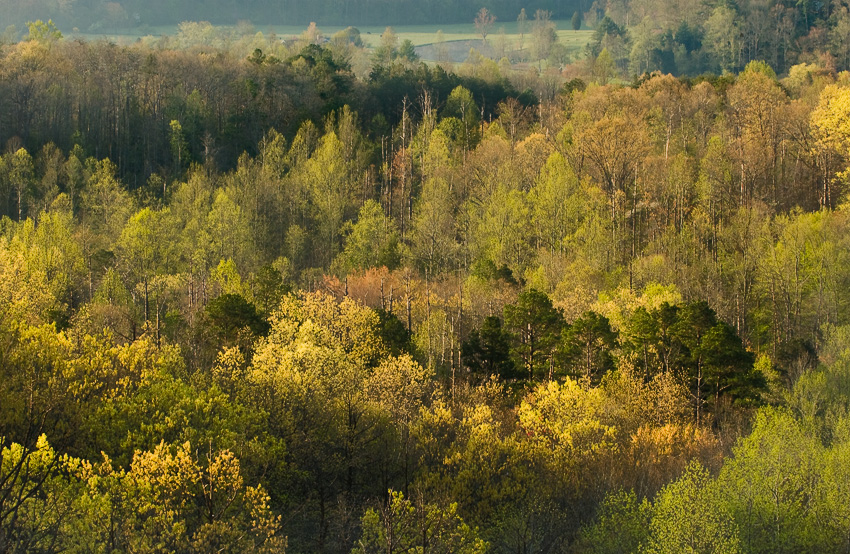
Spring Colors from Foothills Parkway overlook near the Smokies.

Spring Colors from Foothills Parkway overlook near the Smokies.

If you missed it, you really should watch the NANPA website for future events. www.nanpa.org

©2015 Tom Vadnais Photography. All Rights Reserved.

Go Back

In recent posts, I have stressed the importance of making a photograph when you first encounter an interesting scene or subject. If you don’t shoot it right then, you may never have another opportunity. You might not ever make it back there, or the scene might change significantly. Of course, if you do go back, conditions will inevitably be different. You just hope they’ll be even better.

Trying to get a better version of the photograph you first envisioned is a good reason to go back. But further exploration of the area is an even better reason.

Many photographers seem to have a mental checklist of locations, or even of specific shots, that they want to capture. Once they go to that place or get that photo, they can check it off their list, then go on to the next scene, never to return. Continue reading

Comfort Zones & Proper Equipment – Part Two

(Note: Part One is just below this post.)

When we left off, I discovered I didn’t have the right lenses nor the right techniques for capturing birds and critters. But that’s not the end of the story. Hence, Part Two.

As I briefly mentioned in Part One, I also quickly discovered a geared tripod head can be next to worthless for moving subjects. My usual head is an Arca-Swiss C1 Cube, which I absolutely love. Its extreme precision results from its fine-tooth gears that separately control up-and-down (pitch) and side-to-side (roll) motions.

Here’s the beauty of a geared head. Let’s say something’s perfectly aligned from edge to edge in the viewfinder, but is a tad low. Rotating the proper knob will raise the front of the lens without affecting the side to side tilt at all.

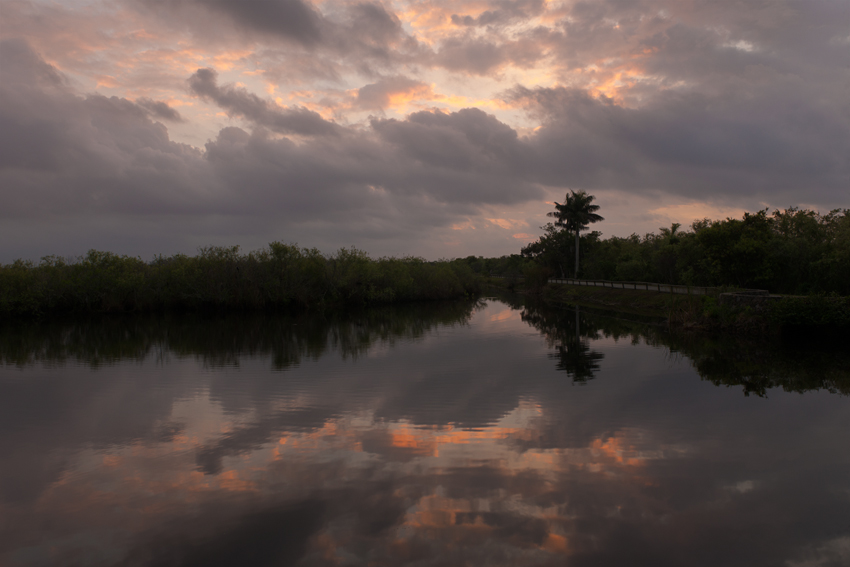
Sunrise at Anhinga Trail

By contrast, loosening the tension on a ball head allows it to move freely in any direction, and may reposition the camera in a way you don’t want. To add insult to injury, many ball heads shift by even the tiniest amount when they are locked back down. You finally get the image perfectly aligned in the viewfinder, but then it moves when you lock the ball head down. Frustrating.

What makes the geared head so perfect for stationary subjects makes it completely worthless for moving subjects (glaciers excluded). By the time you crank the adjustment knobs to capture that bird taking off, it has migrated to another state. But you can precisely frame where it was! Continue reading

Comfort Zones & Proper Equipment – Part One

Thanks to Bill Lea, in February I visited Everglades National Park for the first time as one of the co-leaders of the NANPA Regional Event there. This is the first of two posts about what I learned during that trip.

Before I saw Bill’s photographs for his forthcoming book, I hadn’t thought too seriously about shooting in the Everglades, despite how relatively close the Park is to Atlanta. It seemed like a flat, grassy, swampy area, where the big attractions are birds and critters. I don’t typically shoot birds and critters, nor flat, grassy, swampy areas. It didn’t sound like much of a destination for a landscape and travel photographer. Boy, was I ever wrong.

Fortunately, for several days before the Event, Bill gave us an extensive (and photographically rewarding) tour of the Park, based on his five years of photographing there. I would never have figured out nor enjoyed the Everglades as quickly without Bill’s expert guidance. I found birds and critters fun and challenging to shoot (especially with my equipment), and found the landscape remarkably variable and beautifully photogenic. Now I can’t wait to go back.

As an aside, living with Atlanta traffic, I misunderstood the concept of traveling to a park to shoot birds. During any given rush hour here, you could see so many birds shot within such a short time that it gets old pretty quick. But I get it now.

Believe it or not, just like in many other parks, there are signs denoting elevations in the Everglades. Unlike my experiences in some of the Western parks, however, it wasn’t any harder to breathe even at the highest elevations. I felt pretty much the same at the Elevation 4 Feet sign as I had earlier at the Elevation 3 Feet sign. Guess I’ve stayed in pretty good shape.

My first morning in the Park started with a sunrise shoot over Florida Bay at Flamingo. So far so good. I’m in my comfort zone with my lenses, geared tripod head, focusing cloth, remote release, and the rest of my usual landscape kit.

Sunrise at Flamingo

Sun’s fully up now, so landscape photography is done. It’s off to nearby Eco Pond to shoot birds. Hey, these bloody things move! What’s up with that? And they’re relatively small. And relatively far away. And just as soon as I compose my shot, it’s either changed or gone. There goes my comfort zone. Continue reading

Best Smokies Workshops

Since 2005, I have had the honor of co-teaching two photo workshops per year through the Great Smoky Mountains Institute at Tremont, or GSMIT. For the Spring workshop, I am one of four instructors, led by great friend and legendary Smokies photographer Bill Lea. (Bill is soon to be a legendary Everglades photographer, but that’s a subject for another post this weekend.)

Bill Lea’s newly revamped website is www.billlea.com. Our other instructors (and longtime friends) are wildlife and computer wizard Todd Moore (www.naturephotog.com) and professional photographer and master printer Jeff Miller (www.mountainlens.com).

Trillium and Falls

The workshop is a fun, action-packed four days of talks, shooting, post-processing, and critiques. It all starts with a presentation about the Fundamentals of Photography in the Field by yours truly at 3:00 pm on Friday, April 20, 2012. It ends Monday, April 23, 2012, at 12:30 pm after a couple presentations by me on post-processing and on the challenges of landscape photography. (Don’t worry; I’m pretty quiet in between those. Well, not officially talking, at least!)

Bill will be presenting programs on Light (Friday night), Close-up Photography (Saturday afternoon), and Wildlife Photography (Sunday morning). Wow, sounds like a lot of presentations. It is, but wait, there’s more! Lots more.

During the workshop, we spend even more time out shooting in the field than we do inside for presentations. We are out before sunrise on Saturday and Sunday, with breakfast in the field. (How’s that for service!?!) We’re also out in the afternoon and evening until after the sun goes down both Saturday and Sunday, again with our meals in the field.

Spring Greens at Foothills

In the time between shooting sessions and talks (I told you it was action-packed), we help with your downloading and post-processing needs. We’ll help you select three images to submit for the critique Sunday afternoon before our final organized field session. For many participants, this group critique is the highlight of the weekend. Afterward, we go right back into the field to apply what we’ve covered in the critiques.

Before the presentations Monday morning, there are several choices for sunrise field trips. This gives you yet another chance to capture sunrise at a location of your choice. By the time the light is too harsh for good photography later in the morning, it will be time for the last two talks and discussions.

Spring Green Tree, Cades, Cove

We usually have quite a few returning participants every time. And that’s not because they flunked and had to retake the course! It’s because it is so much fun, and they can see improvements in their photography each time.

For more information, or to register, please check out: http://www.gsmit.org/springphoto.html

Please feel free to e-mail me if you have any questions or would like more information. I hope to see you there!